
Crear un mapa
¿Te gusta el concepto y quieres tener tu propio mapa para compartir con tu comunidad? ¿O tal vez prefieres guardarlo en privado para revivir tus recuerdos de viaje de vez en cuando? ¡Vamos allá! Te guiaré paso a paso para hacerlo fácilmente.
Empezar
El primer paso es ir a https://www.traveledmap.com/builder para añadir un nuevo viaje. En esta página encontrarás un mapa vacío y una ventana con tres pestañas a la izquierda:
- Añadir la ubicación principal del viaje y nombrarlo.
- Añadir las etapas de tu viaje.
- Añadir fotos a las etapas.

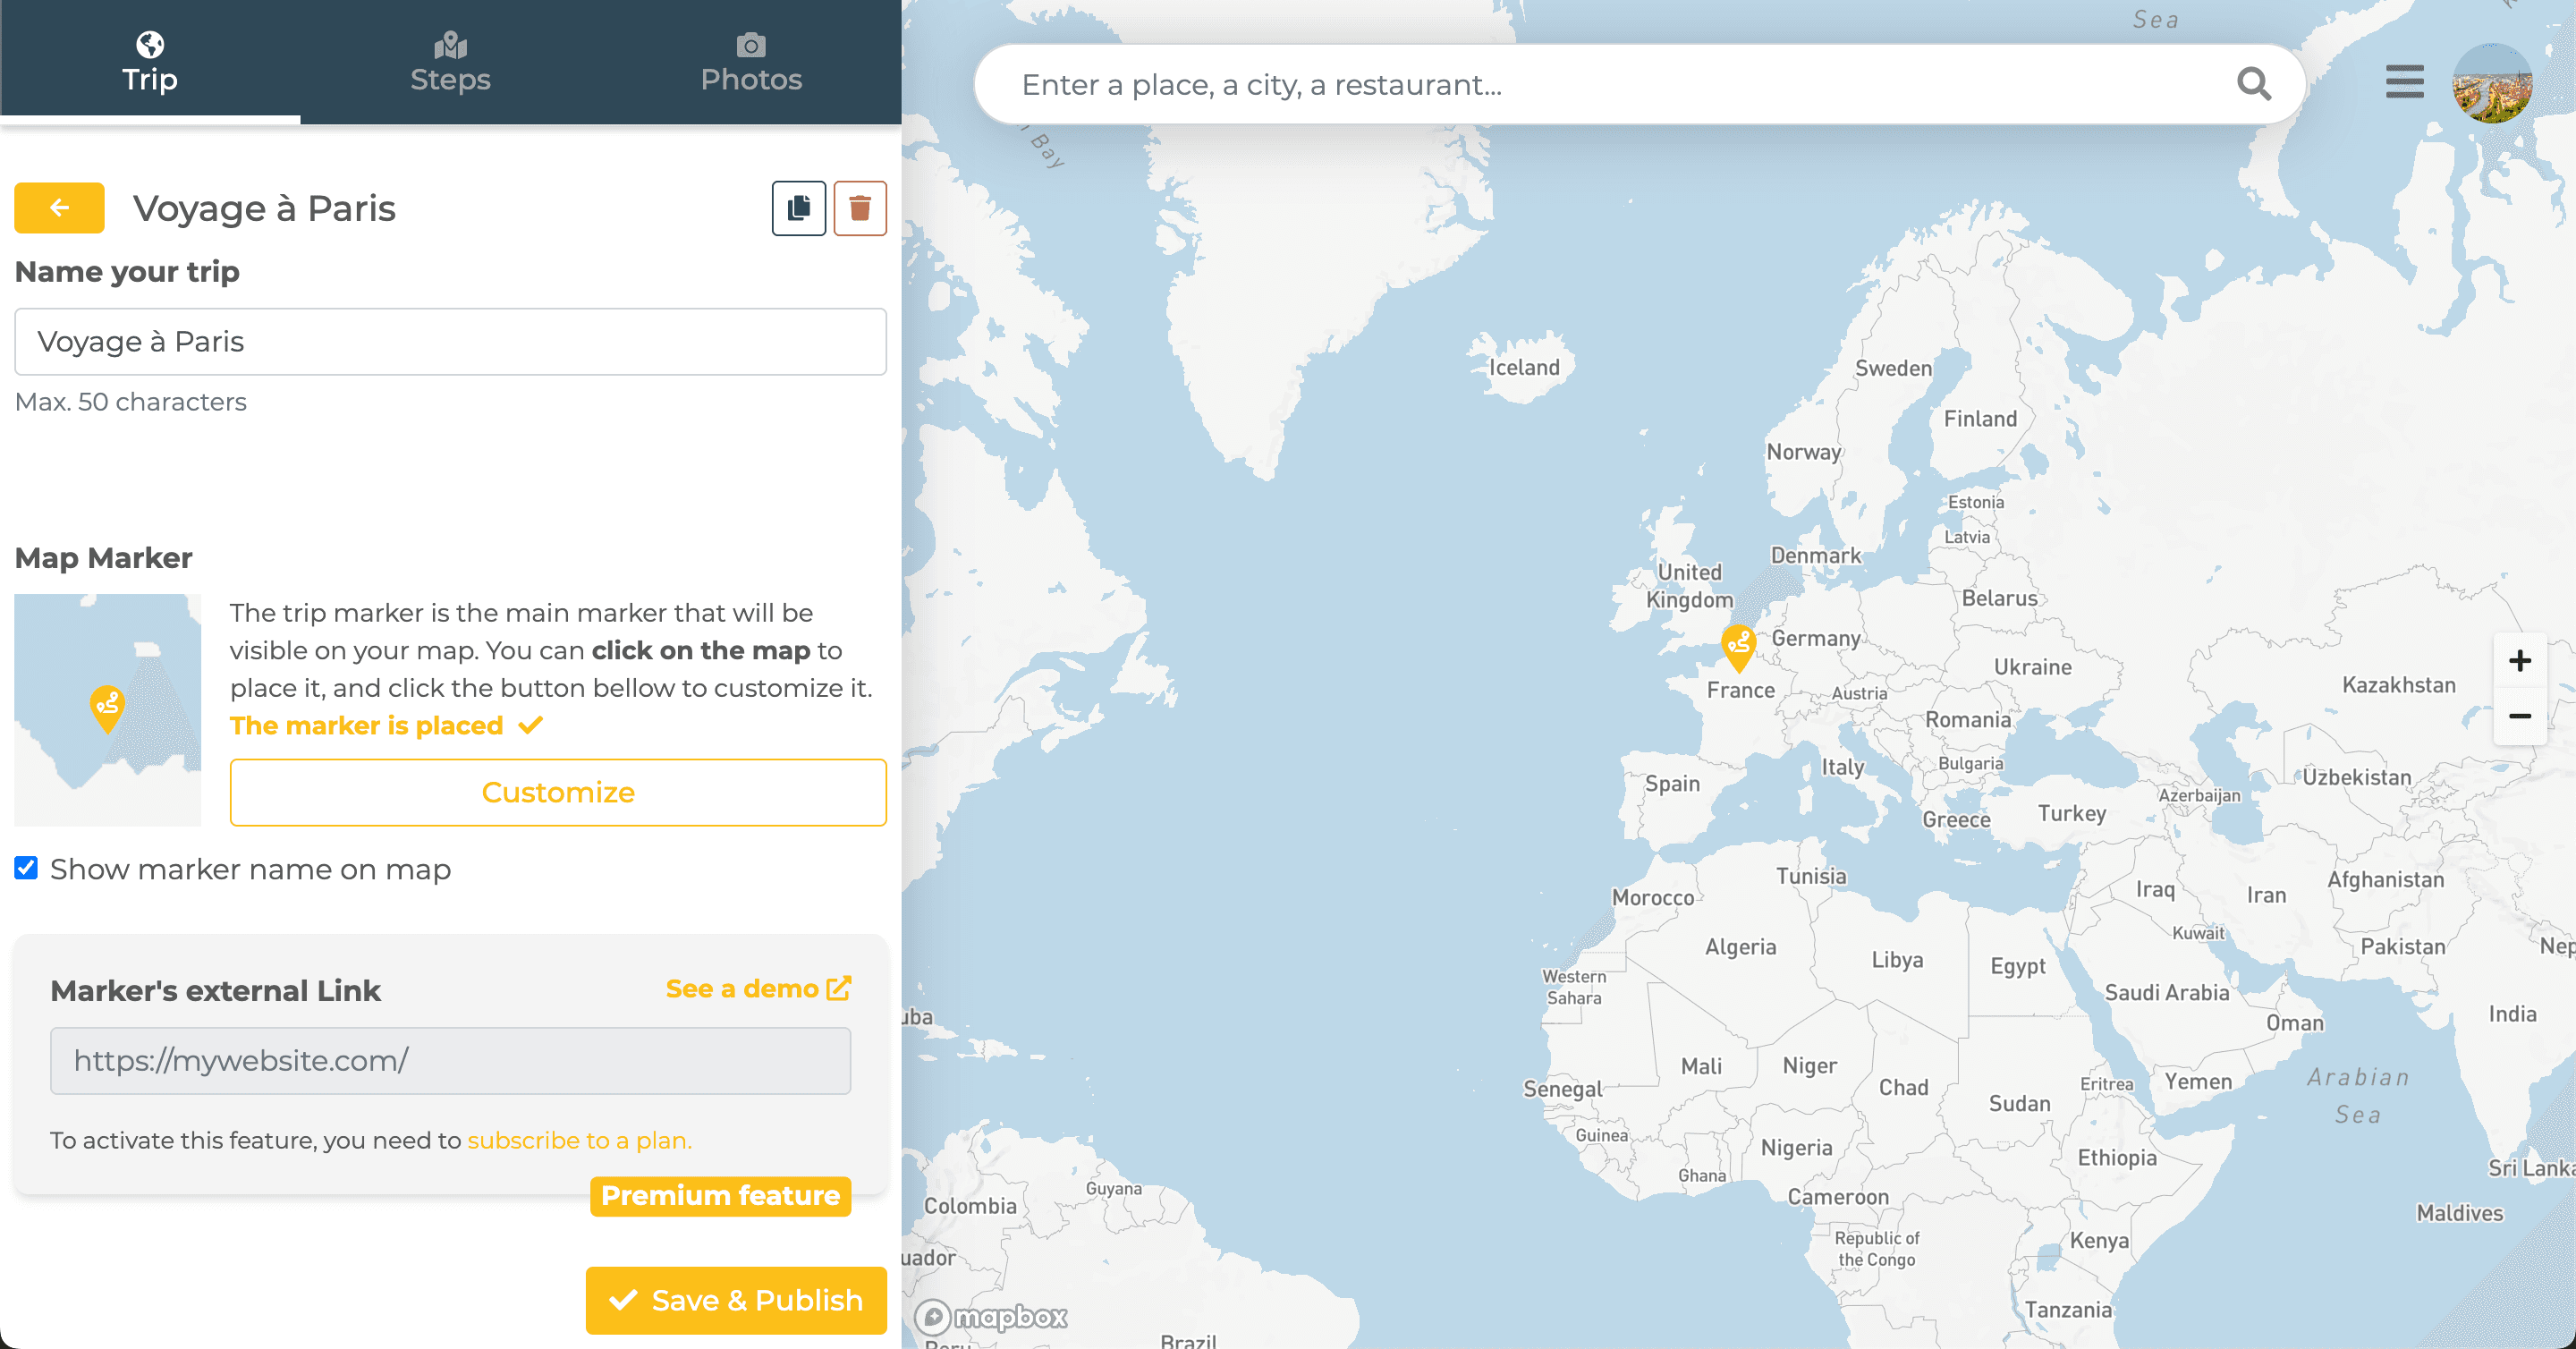
Añadir la ubicación principal del viaje
Una vez en el mapa (https://www.traveledmap.com/builder), puedes añadir la ubicación principal haciendo clic donde quieras colocar el marcador. Este marcador representa el punto central del viaje y te permite visualizarlo fácilmente.
Esta ubicación principal es útil en dos casos:
- Para todos los viajes, este marcador aparece en el mapa global representando tu viaje.
- Para escapadas sin un itinerario detallado, puede ser el único punto mostrado en el mapa.
Puedes mover el marcador haciendo clic en otra parte del mapa. También puedes nombrar tu viaje en la ventana a la izquierda.
Para cambiar el estilo del marcador, visita https://www.traveledmap.com/help/customize.
En la misma ventana, la opción "Mostrar el nombre del marcador en el mapa" te permite decidir si el nombre del viaje aparece o no.
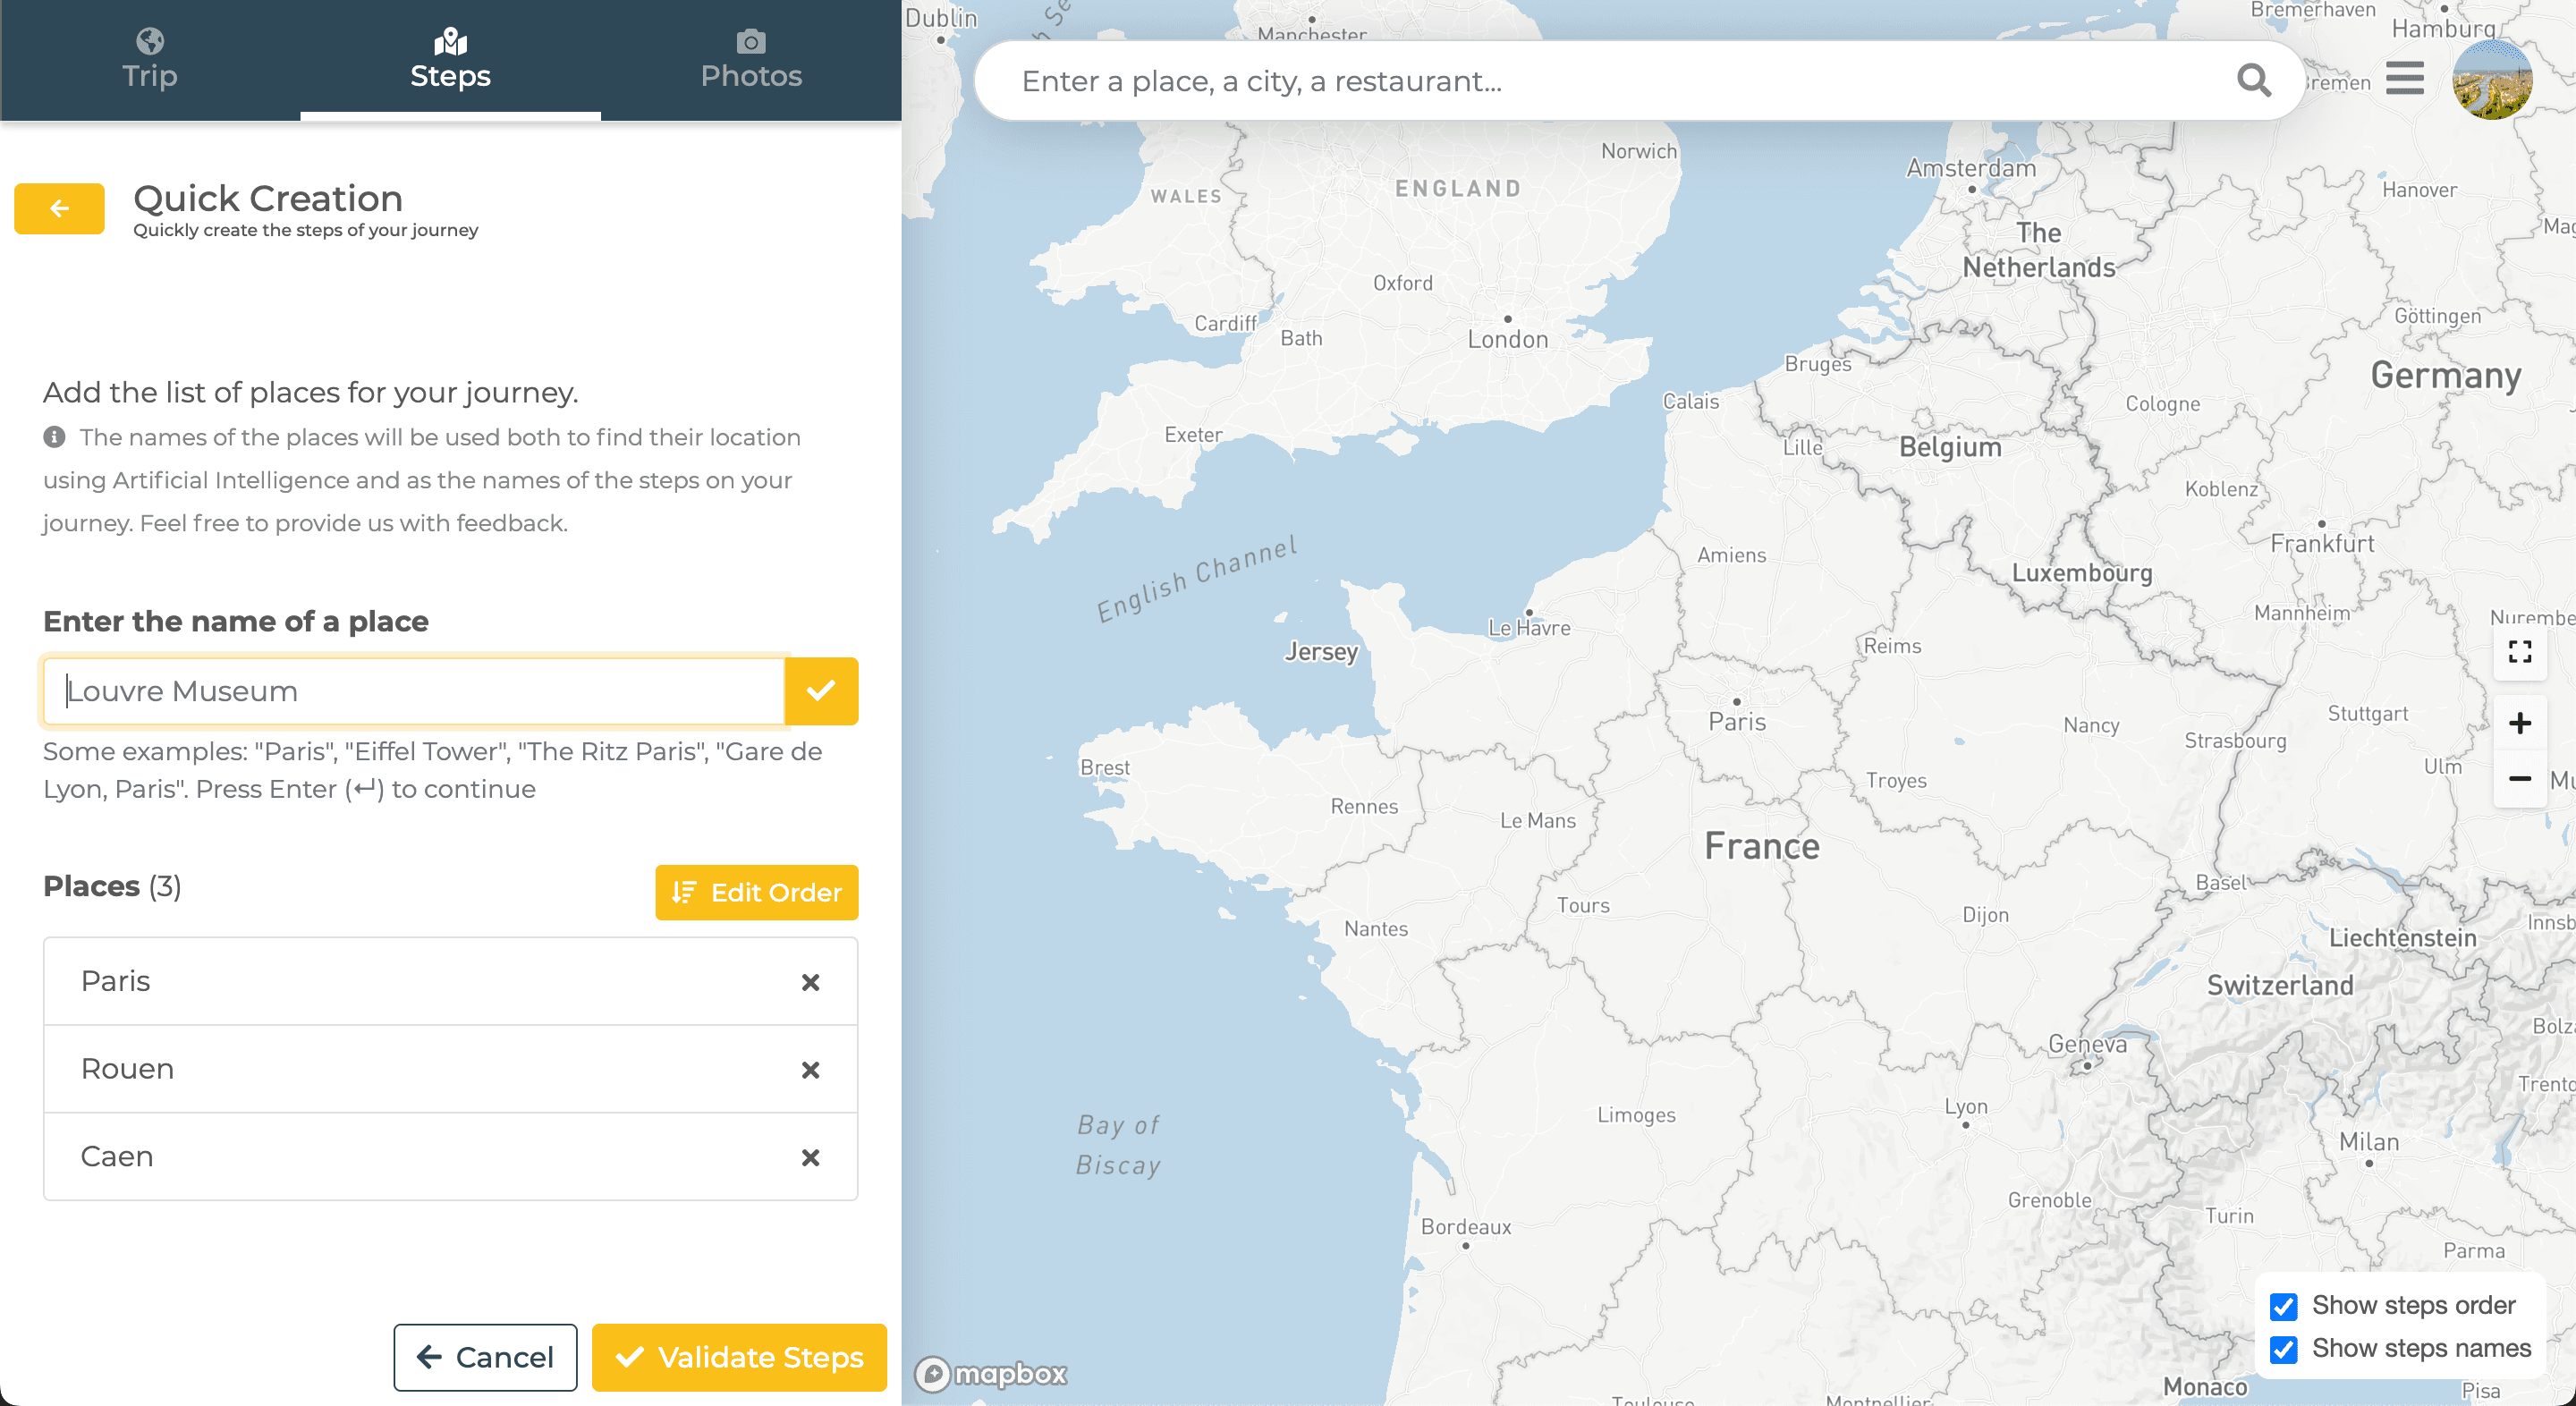
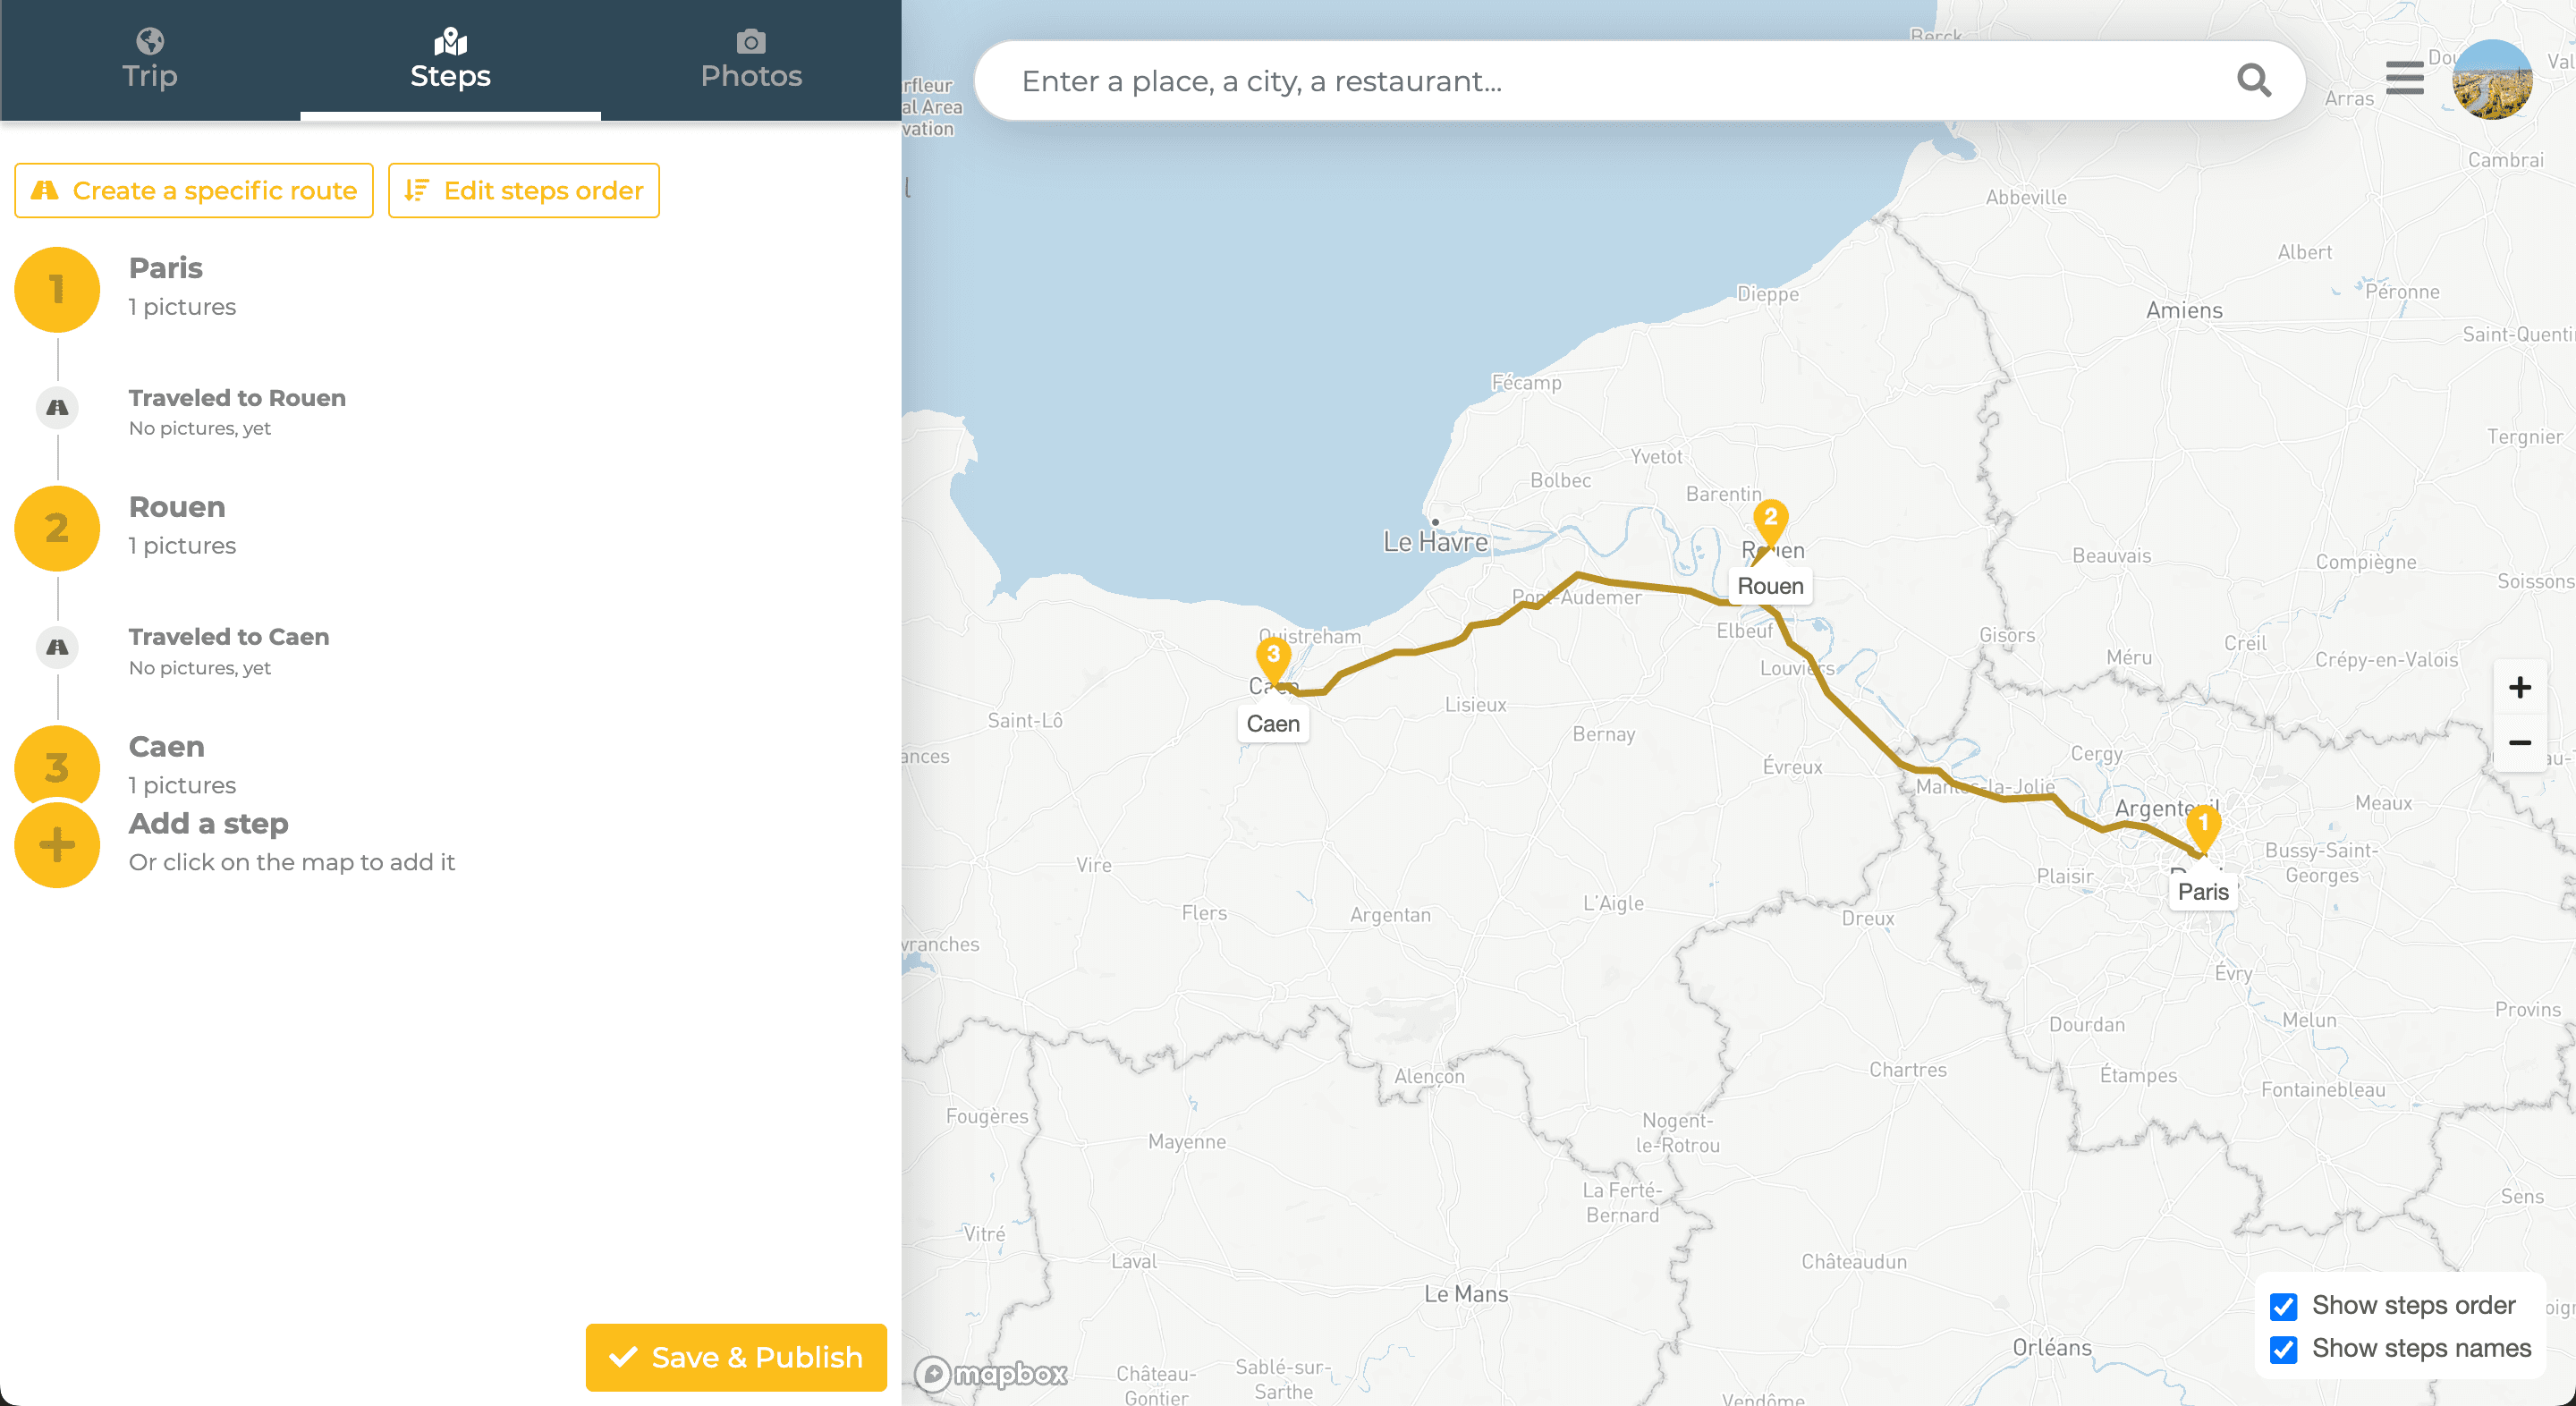
Añadir etapas al viaje
Una vez elegida la ubicación principal, puedes añadir etapas haciendo clic en la pestaña “Etapas” en la parte izquierda.
Con ayuda de la IA
Para usar la IA, haz clic en "Añadir todas las etapas", luego escribe tu texto en el campo usando nombres de ciudades o lugares específicos como “Empire State Building”. Pulsa Enter o haz clic en el icono para confirmar. Cuando hayas terminado, haz clic en "Validar etapas".
Puedes reorganizar las etapas haciendo clic en "Editar orden" o eliminar una etapa haciendo clic en la cruz correspondiente.
Manual
Para añadir etapas manualmente, haz clic en "Añadir etapa por etapa". Luego haz clic en el mapa para colocar el punto, nómbralo y añade fotos si quieres. Valida cuando hayas terminado.
Para eliminar la etapa actual, haz clic en "Eliminar esta etapa".
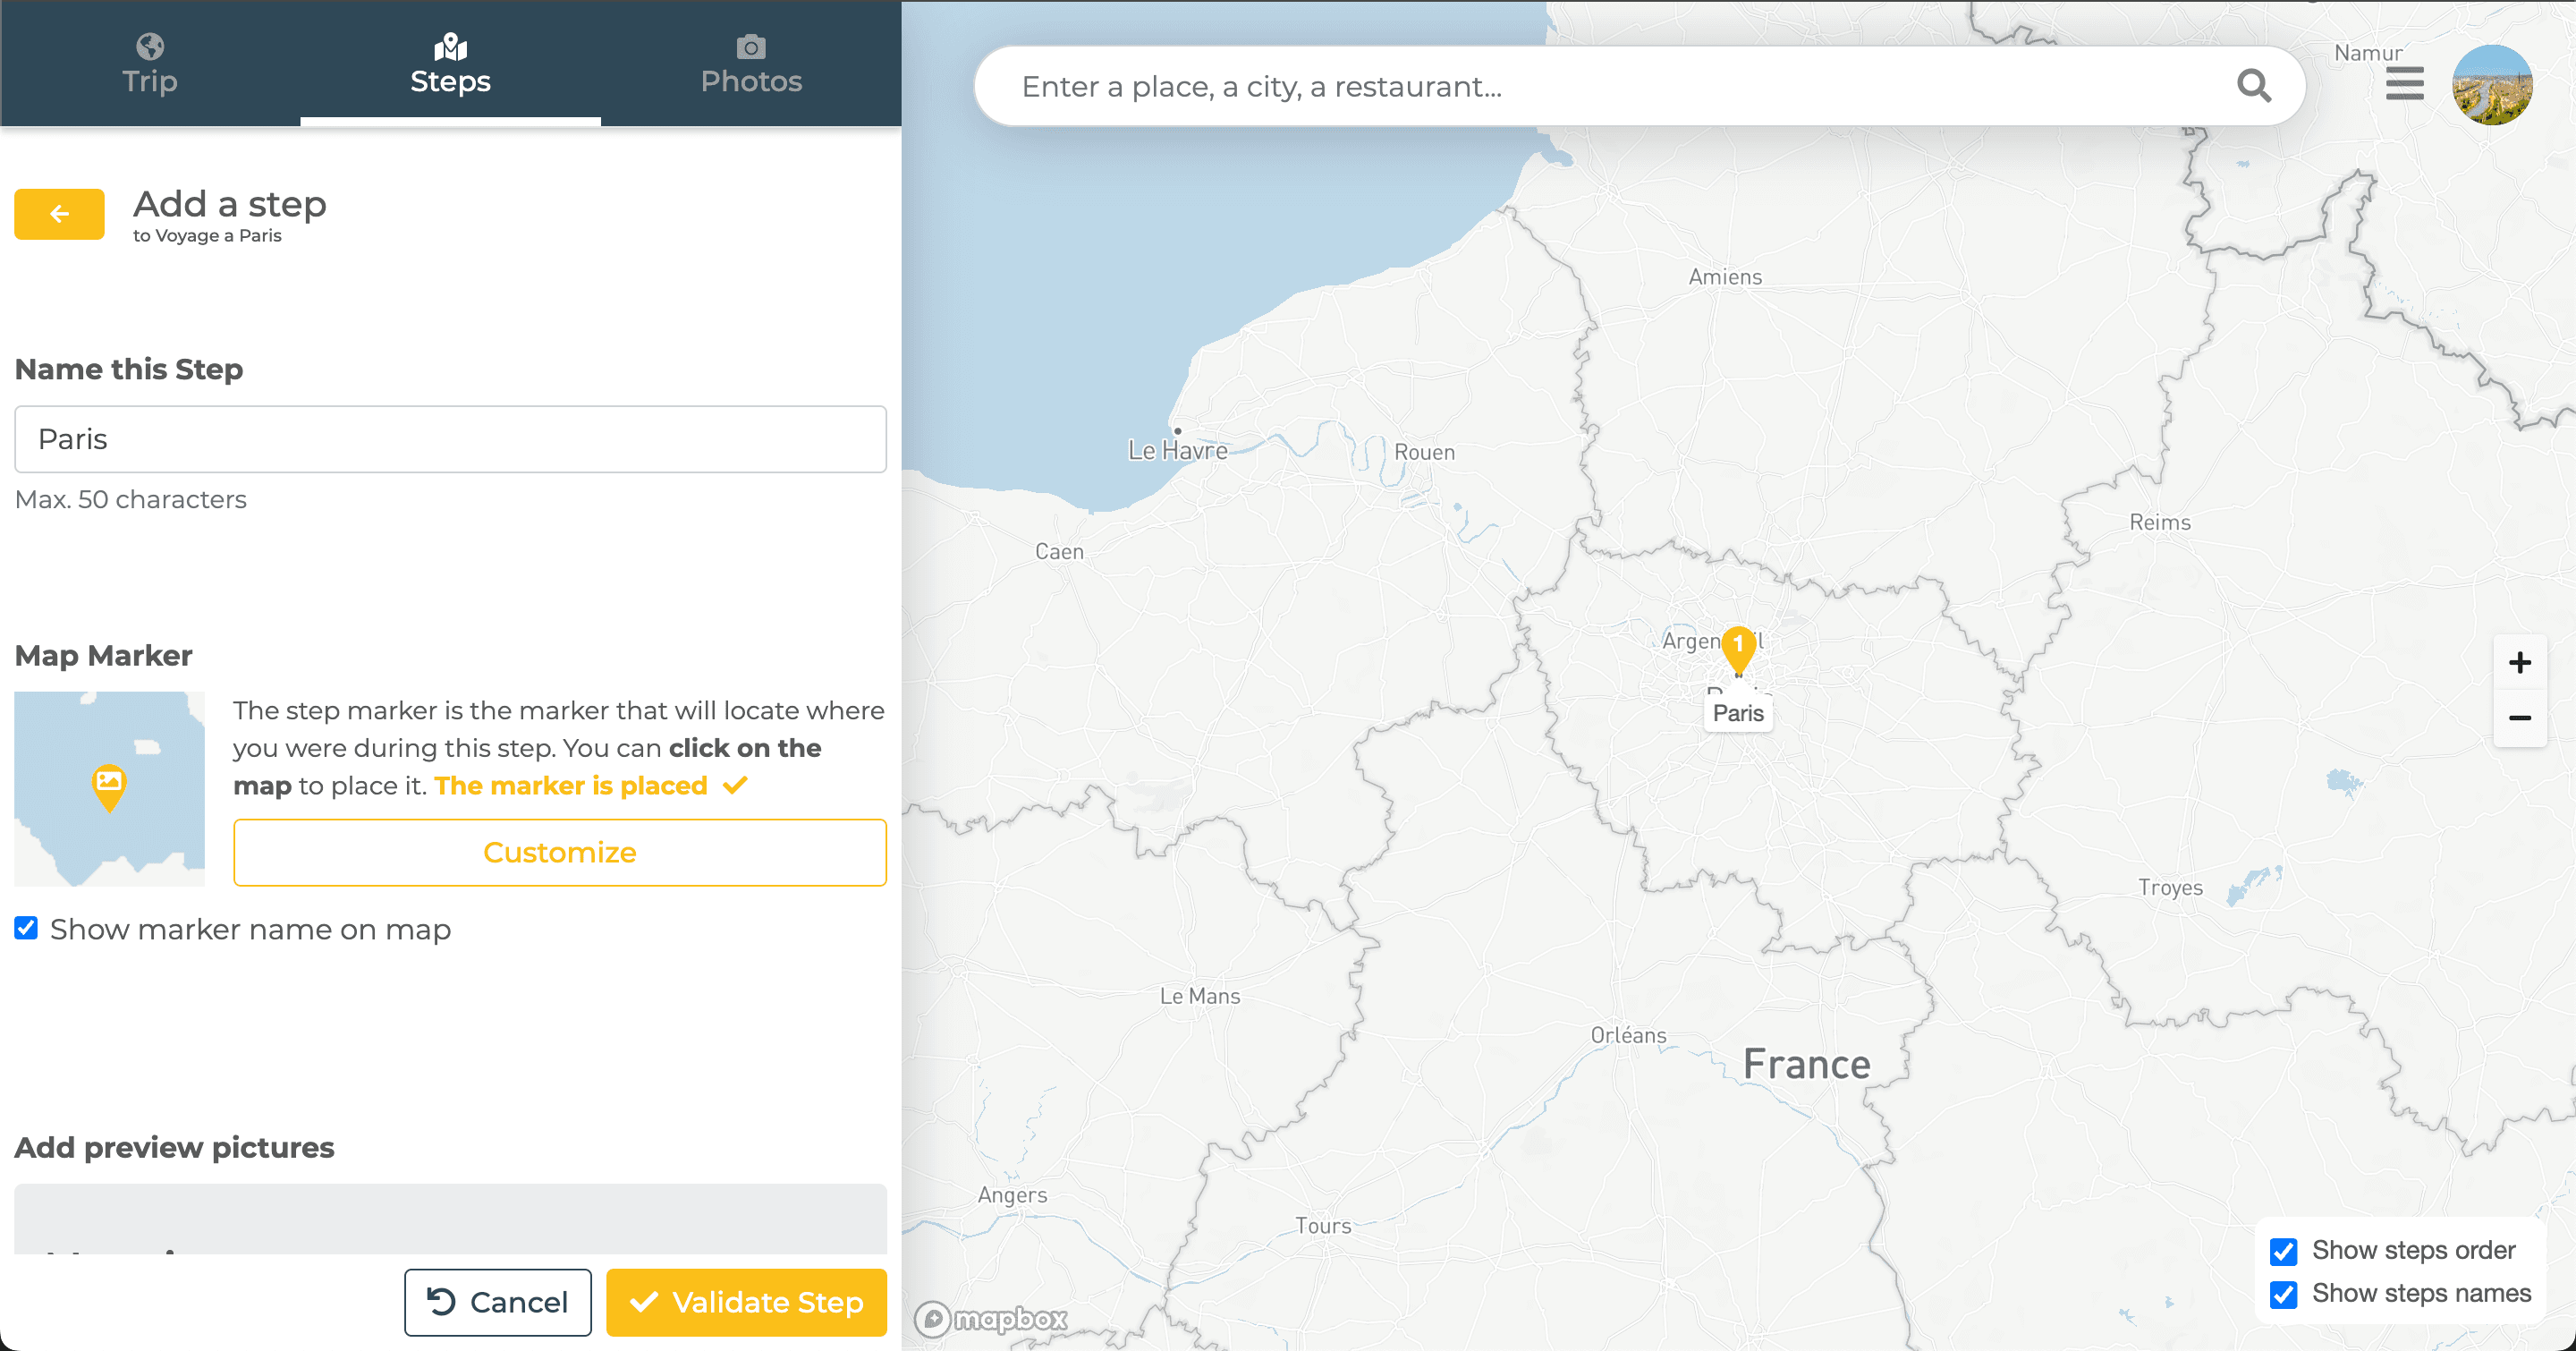
- Puedes personalizar el estilo del marcador haciendo clic en "Personalizar". Más detalles aquí: https://www.traveledmap.com/help/customize
- Puedes elegir si se muestra el nombre del marcador marcando o desmarcando la casilla.
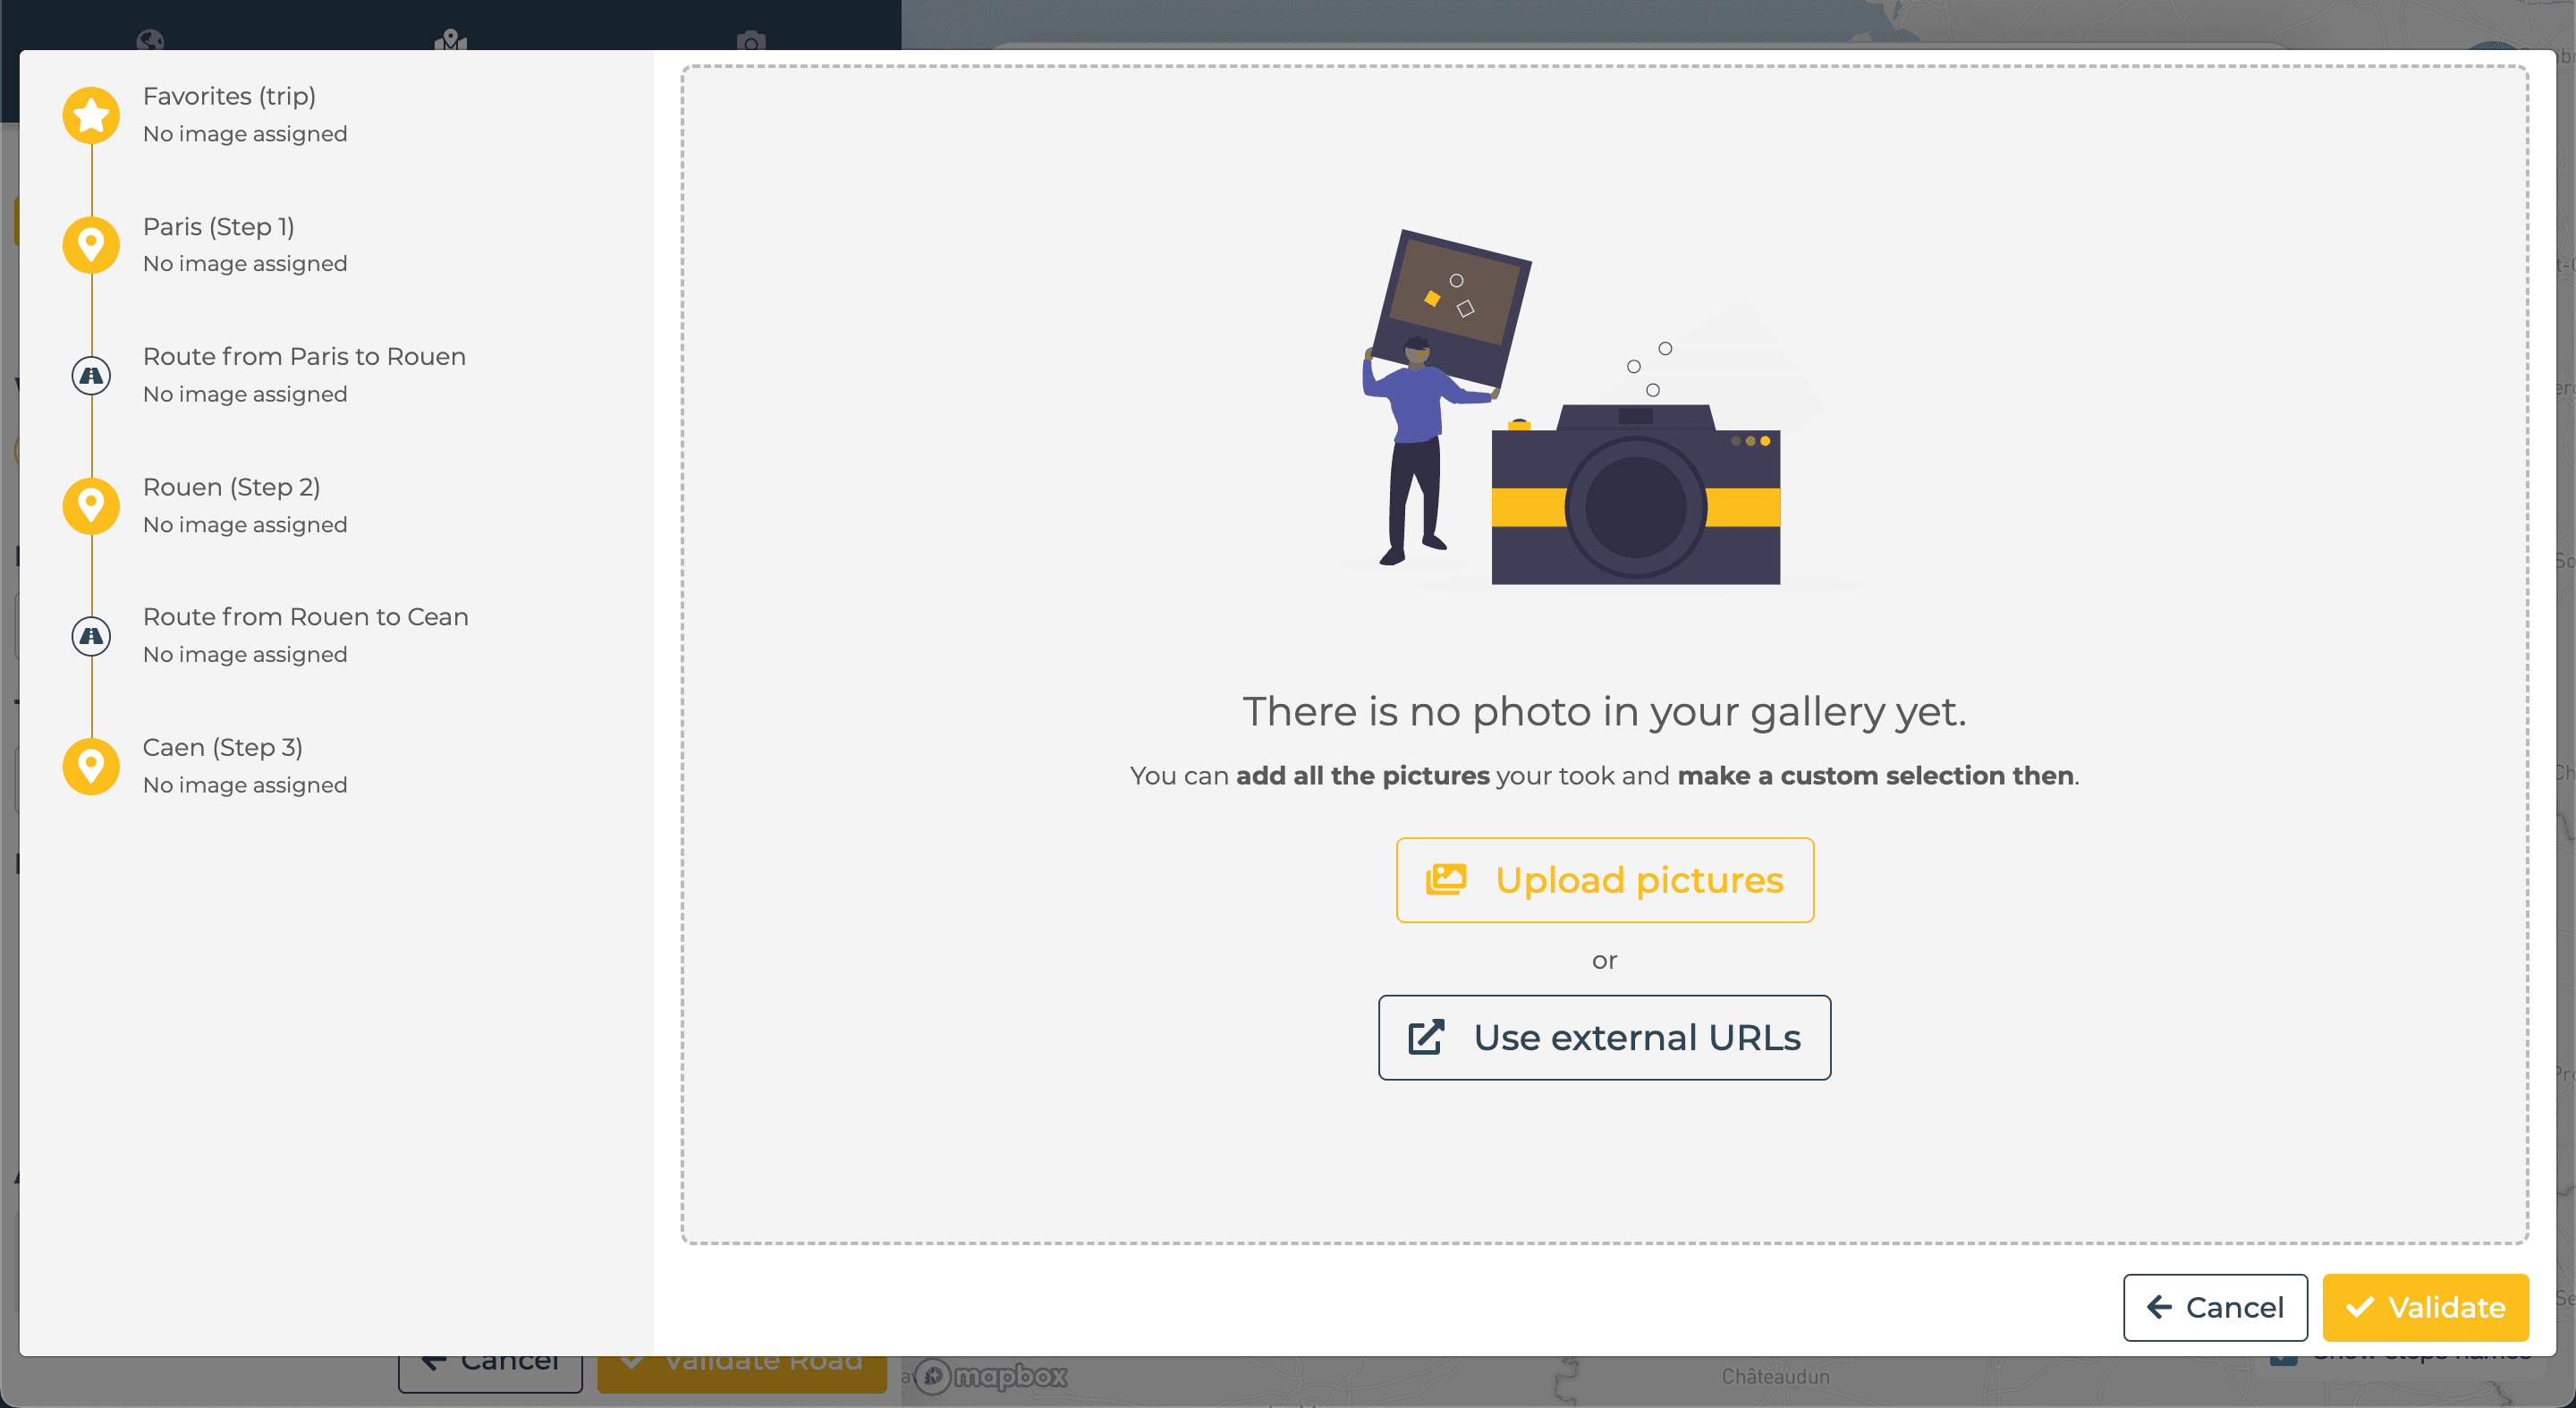
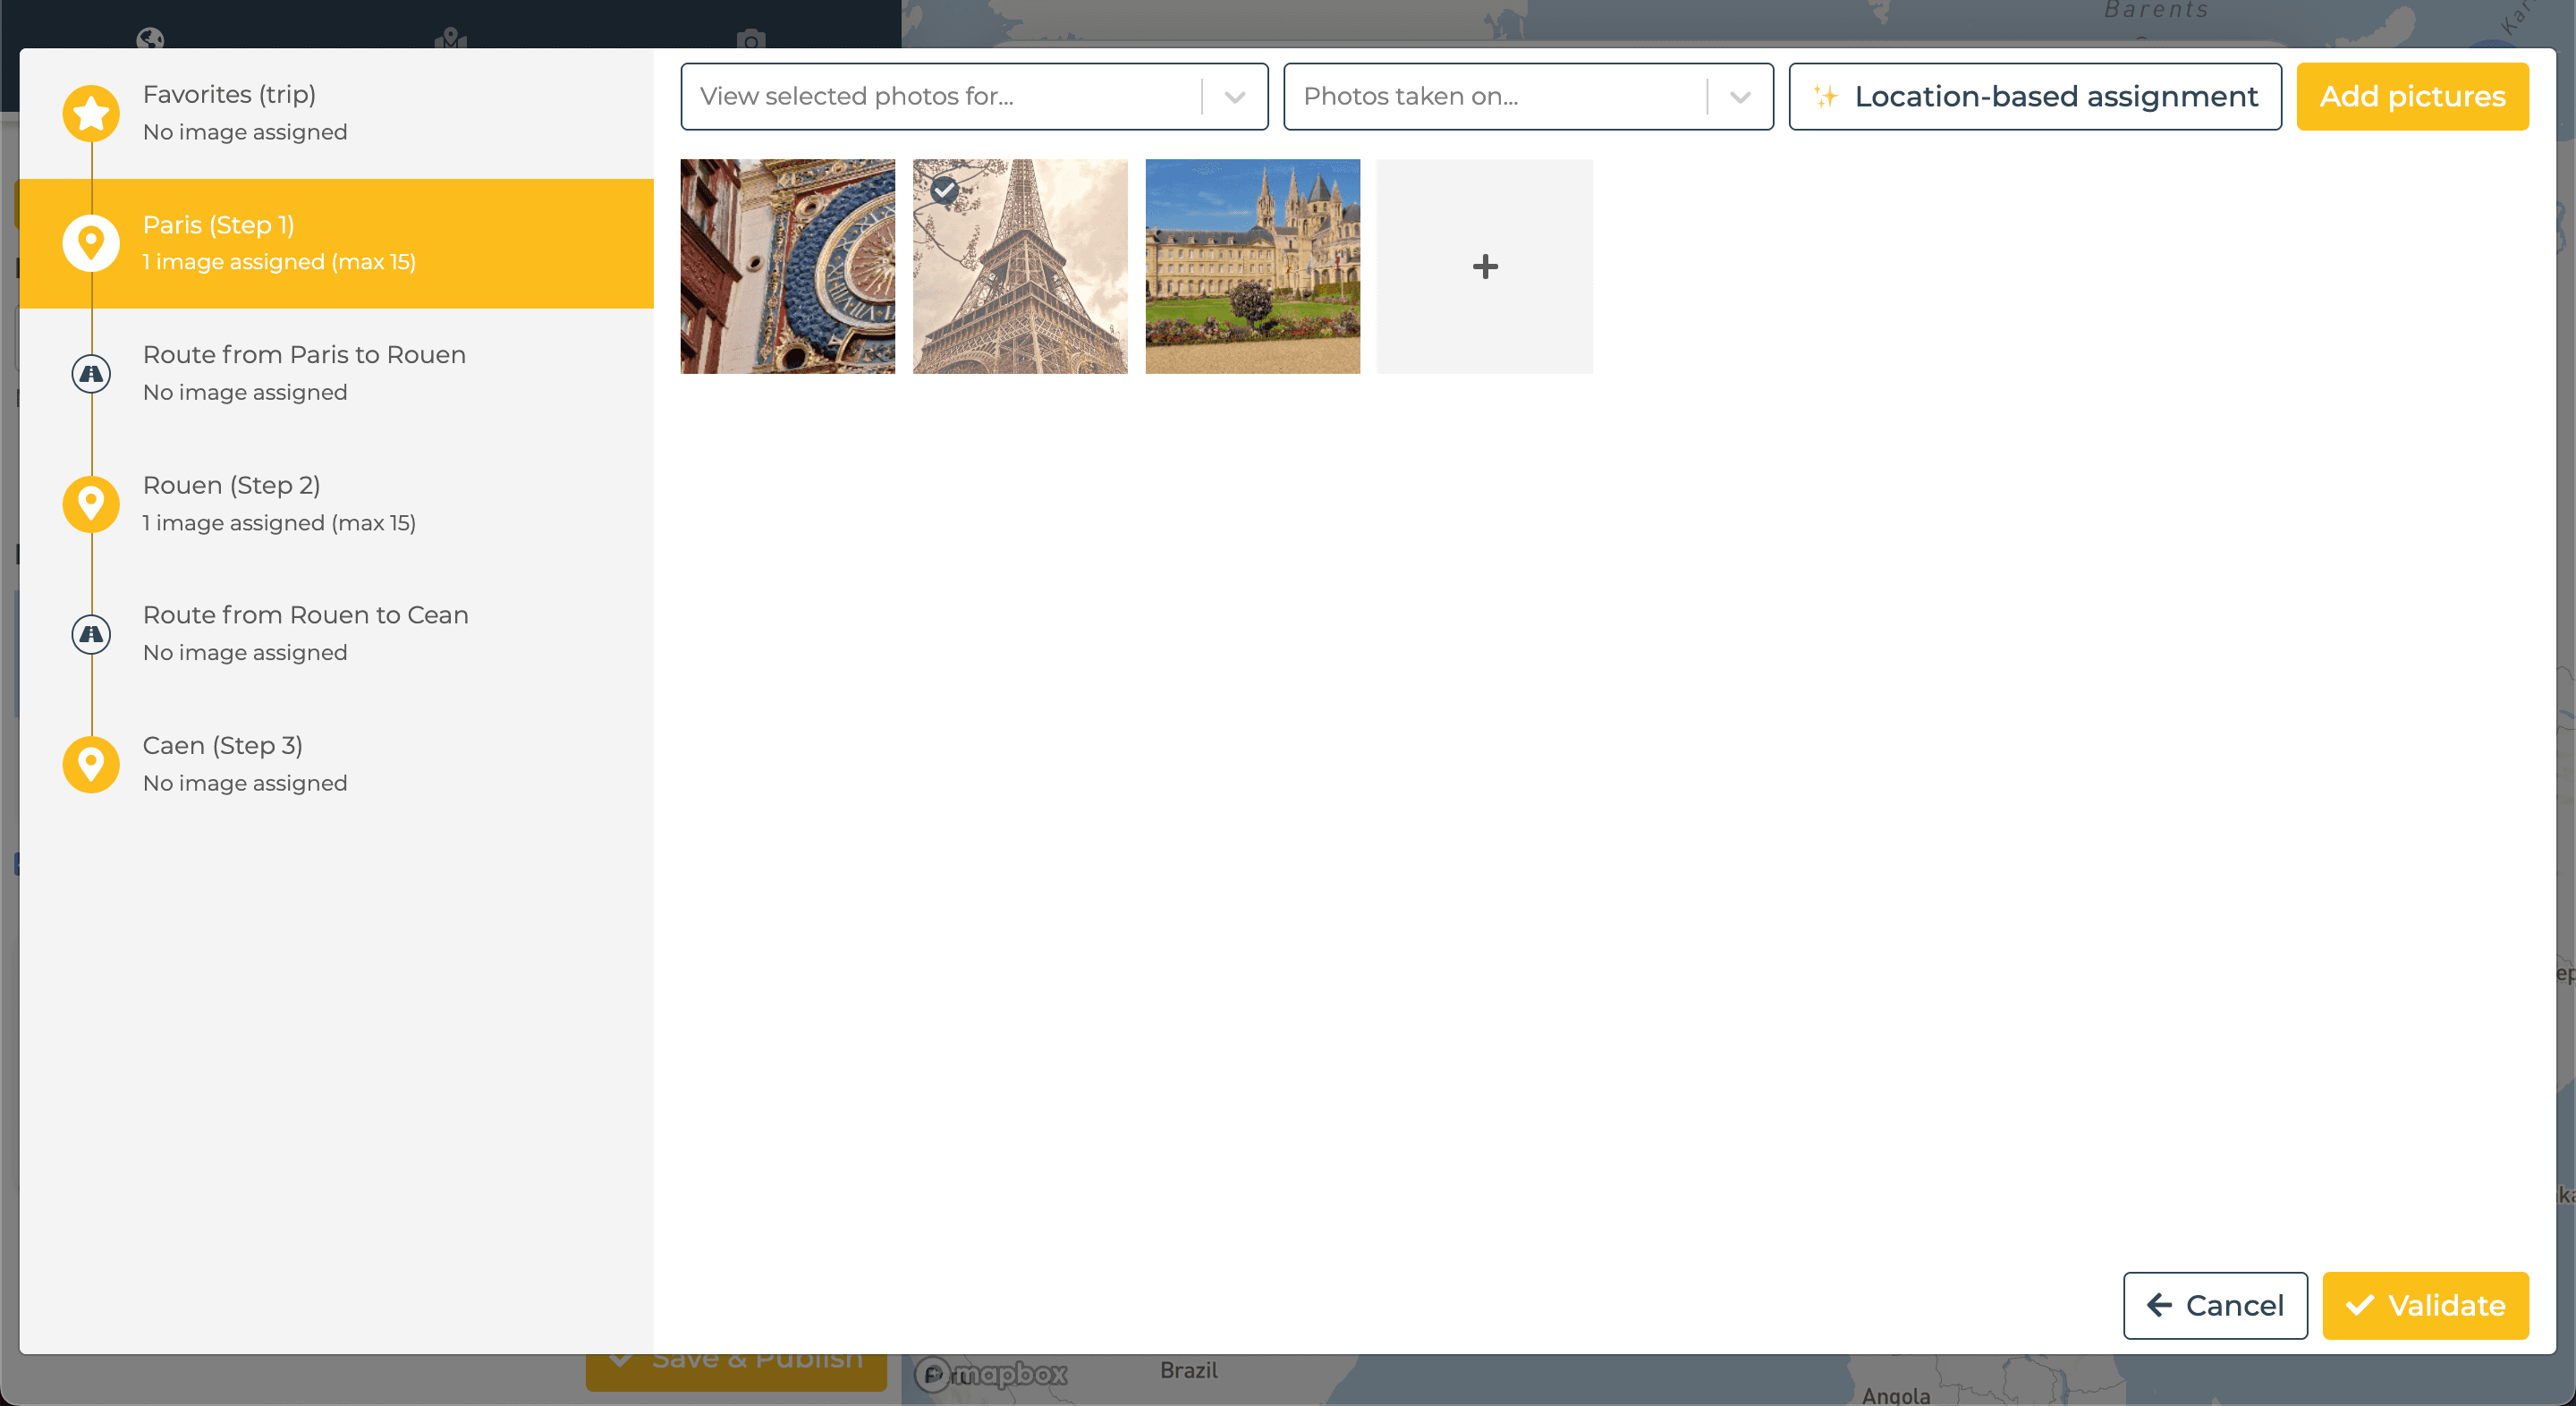
Añadir fotos
Para añadir fotos, haz clic en "Fotos" en la parte izquierda. Sube tus imágenes con "Subir fotos" o añade enlaces externos con "Introducir URLs externas". Puedes asignar fotos al marcador principal, a etapas o rutas.
Asignación por localización
Para asignar fotos según su ubicación, asegúrate de que fueron tomadas con GPS activado y sin modo avión. Los datos GPS permitirán asignarlas automáticamente. Luego haz clic en "Asignar por localización" y "Validar" abajo a la derecha.
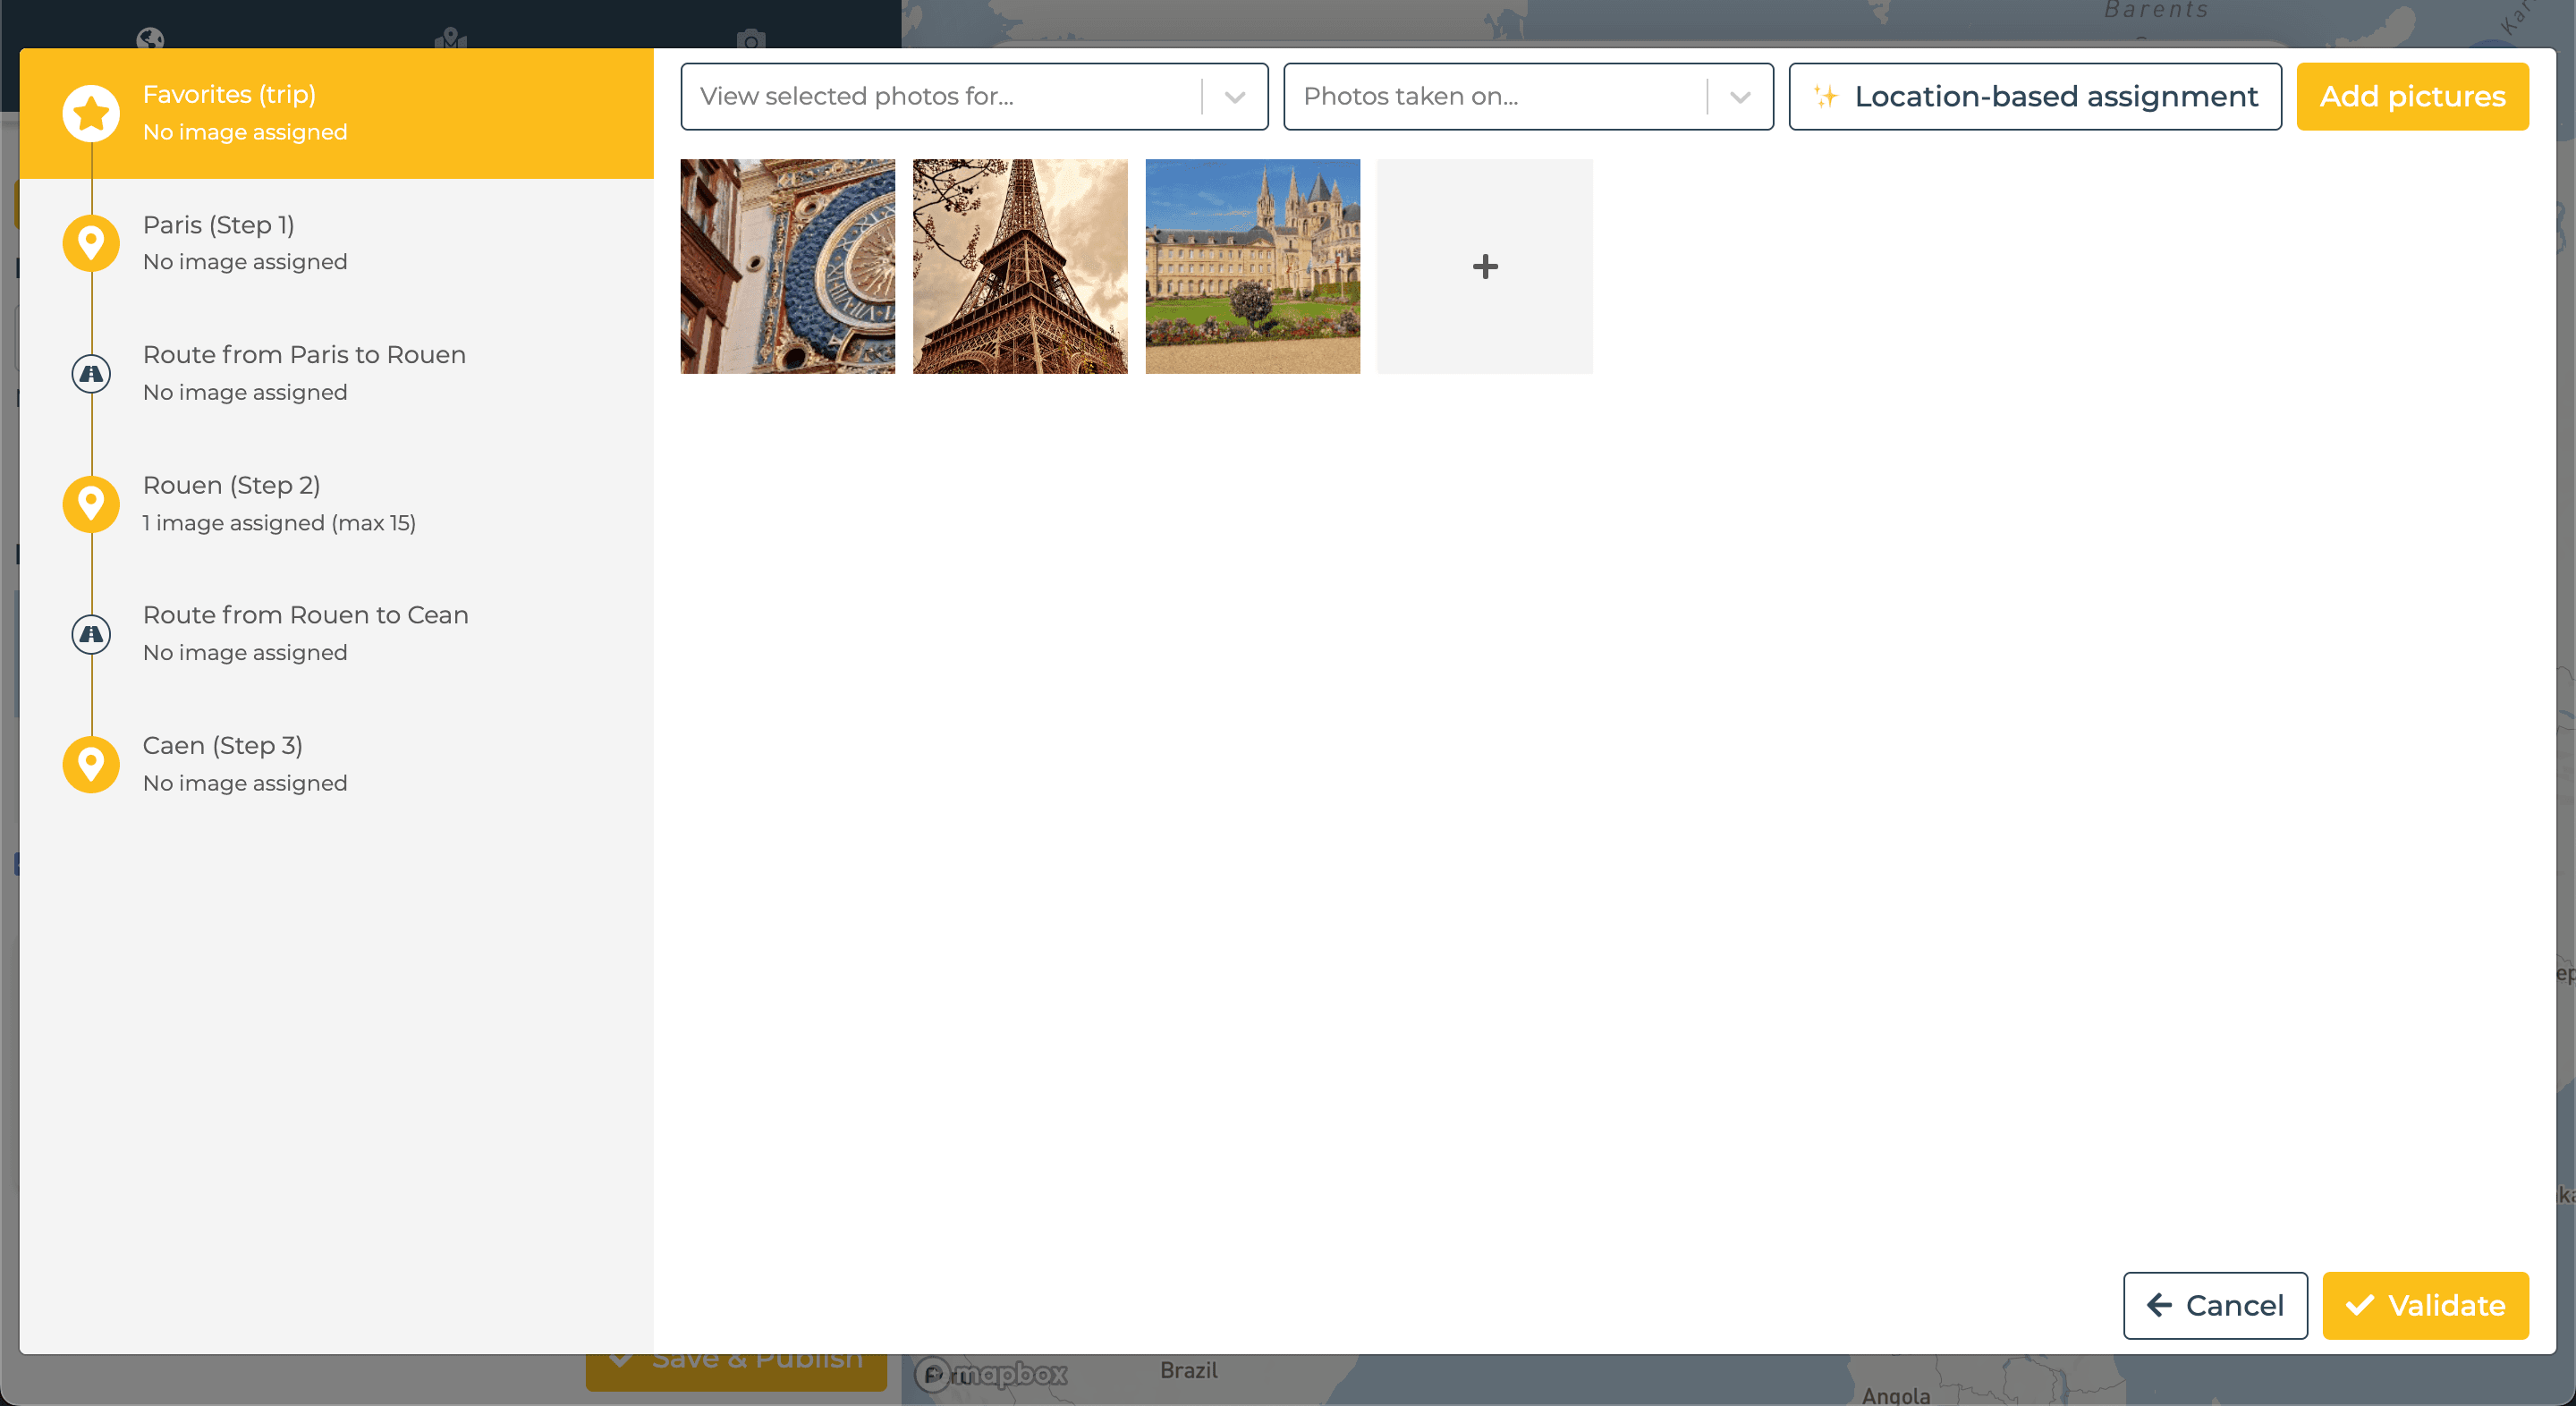
Asignación manual
Para asignar fotos manualmente, selecciona la etapa o ruta, marca las fotos deseadas y haz clic en "Validar" para guardar.
Guardar
Cuando termines tu viaje, revisa las pestañas de Viaje, Etapas y Fotos para verificar que todo esté correcto. Luego tienes dos opciones:
- Haz clic en "Guardar como borrador" para mantenerlo privado. Solo tú podrás verlo.
- Haz clic en "Guardar y publicar" para hacerlo público. Será visible para quienes tengan acceso a tu mapa.
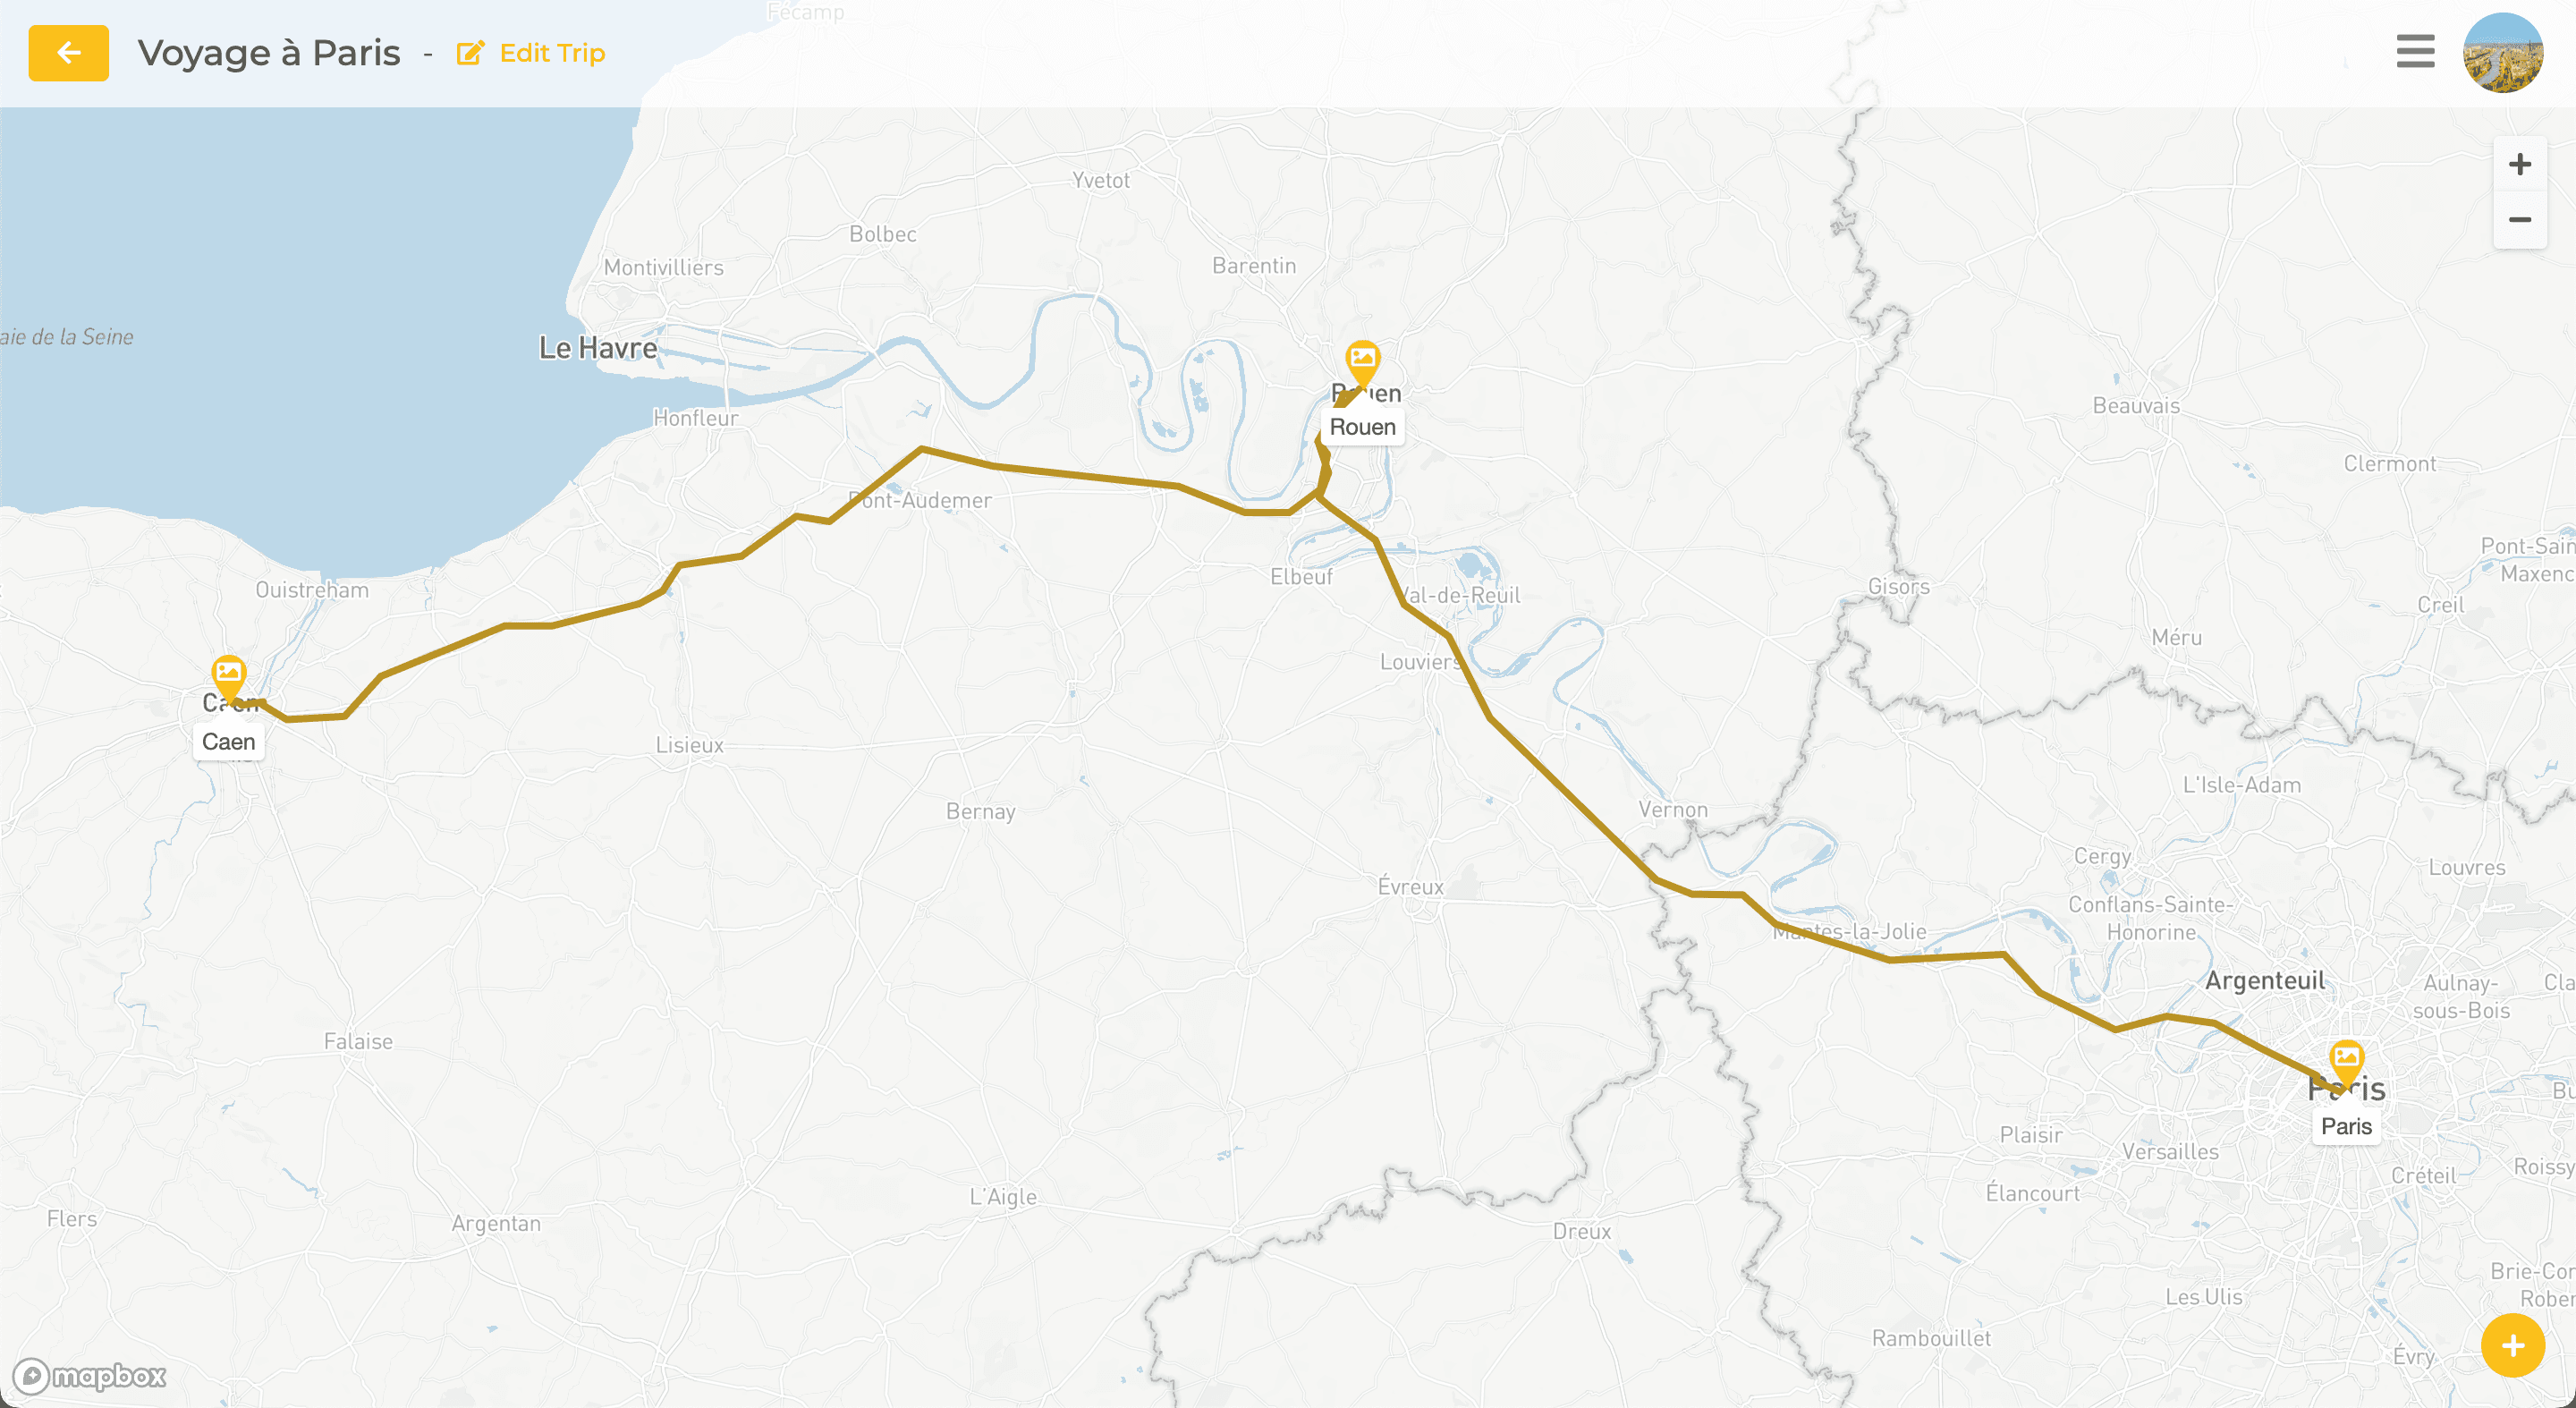
Una vez guardado, tu viaje aparecerá en el mapa. Para ver las etapas, haz clic en la ubicación principal y luego accede a las fotos desde cada etapa.
Editar
¿Olvidaste algo o cometiste un error? ¡No te preocupes! Puedes editar tu viaje en cualquier momento haciendo clic en "Editar viaje", ajusta lo necesario y luego haz clic en "Guardar y publicar" otra vez.
Si encuentras algún problema, no dudes en contactar con nuestro equipo por correo electrónico en contact@traveledmap.com