
Create a map
Do you like the concept and want your own map to share with your community? Or maybe keep it private to revisit your travel memories now and then? Let's go — this guide walks you through the process step by step!
Getting Started
The first step is to go to https://www.traveledmap.com/builder to add a new trip. On this page, you'll see an empty map and a panel with three tabs on the left side:
- Add the main location of the trip (the marker you want to appear on your TraveledMap) and name your trip.
- Add the steps of your trip.
- Add photos to your steps.

Add the Main Trip Location
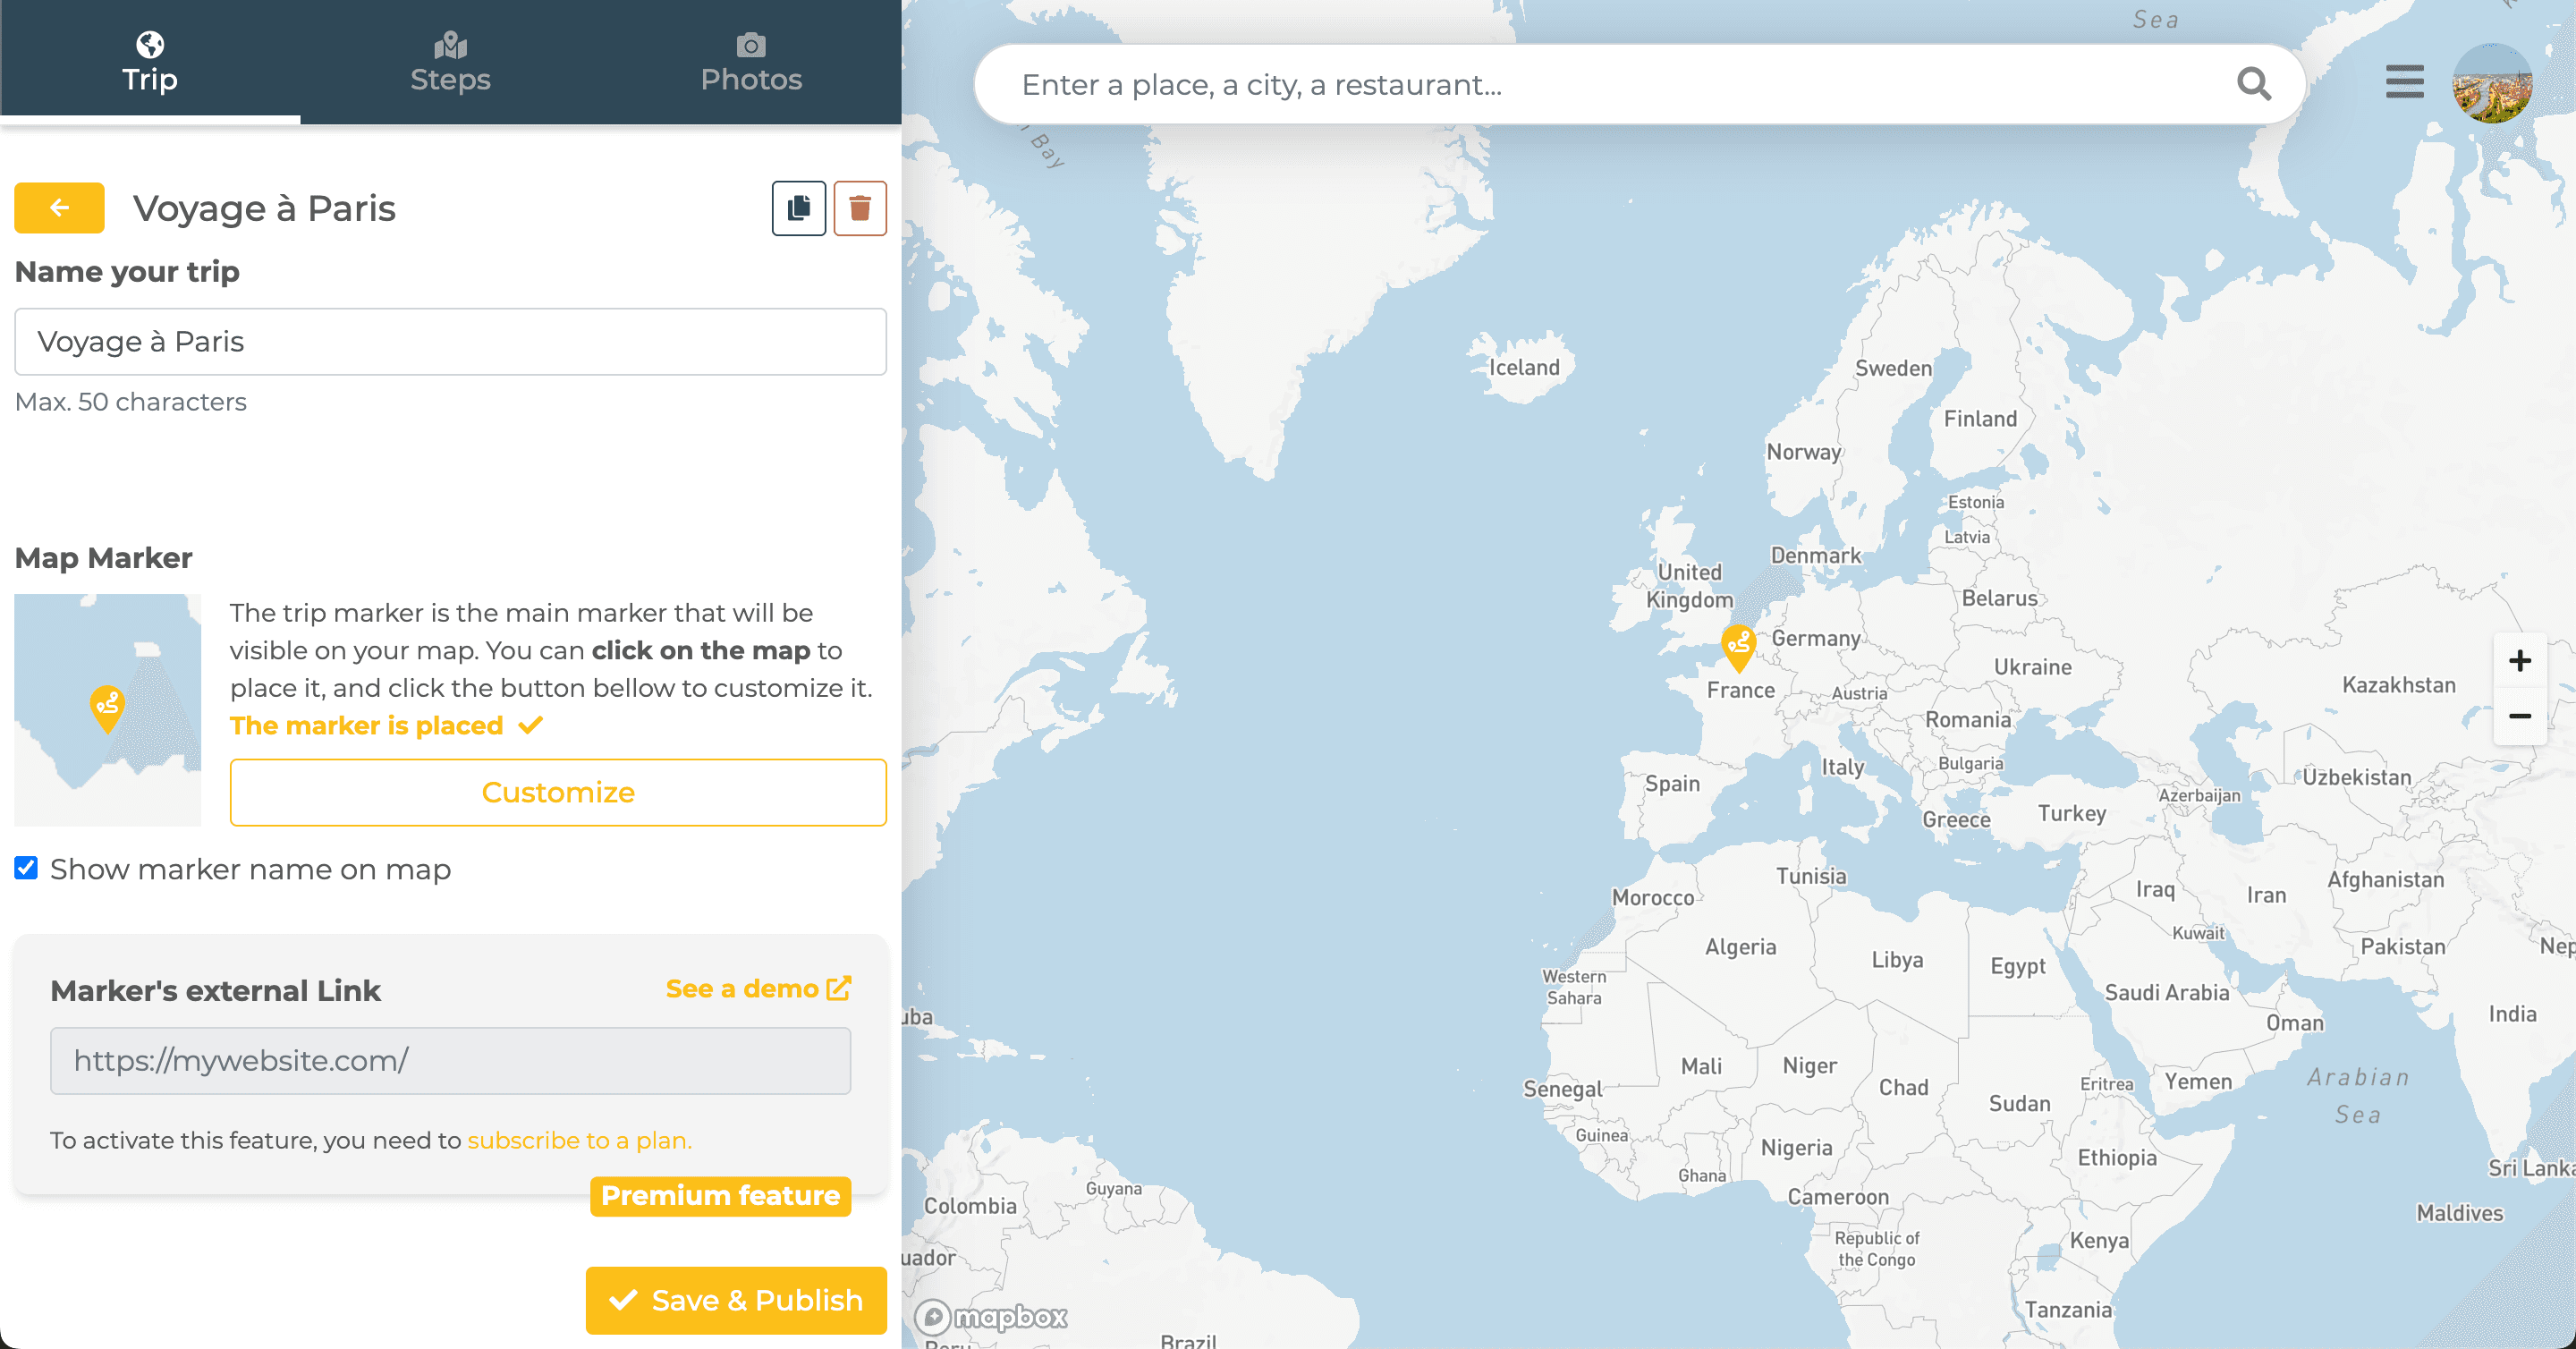
Once you're on the map (https://www.traveledmap.com/builder), you can add the main location of your trip by clicking on the desired spot to place the trip marker. This marker represents the central point of your trip: it gives an overview on the map and helps locate it easily.
This main location is useful in two cases:
- For all trips, this marker appears on the global map to represent your journey.
- For short getaways without a detailed itinerary, it might be the only point displayed, giving a quick view of where you went.
Once placed, you can move the marker by clicking elsewhere on the map. You can also name your trip using the panel on the left side of the screen.
To change the marker style, visit the https://www.traveledmap.com/help/customize page.
In the same panel, the "Show marker name on map" option lets you choose whether the trip name appears on your TraveledMap.
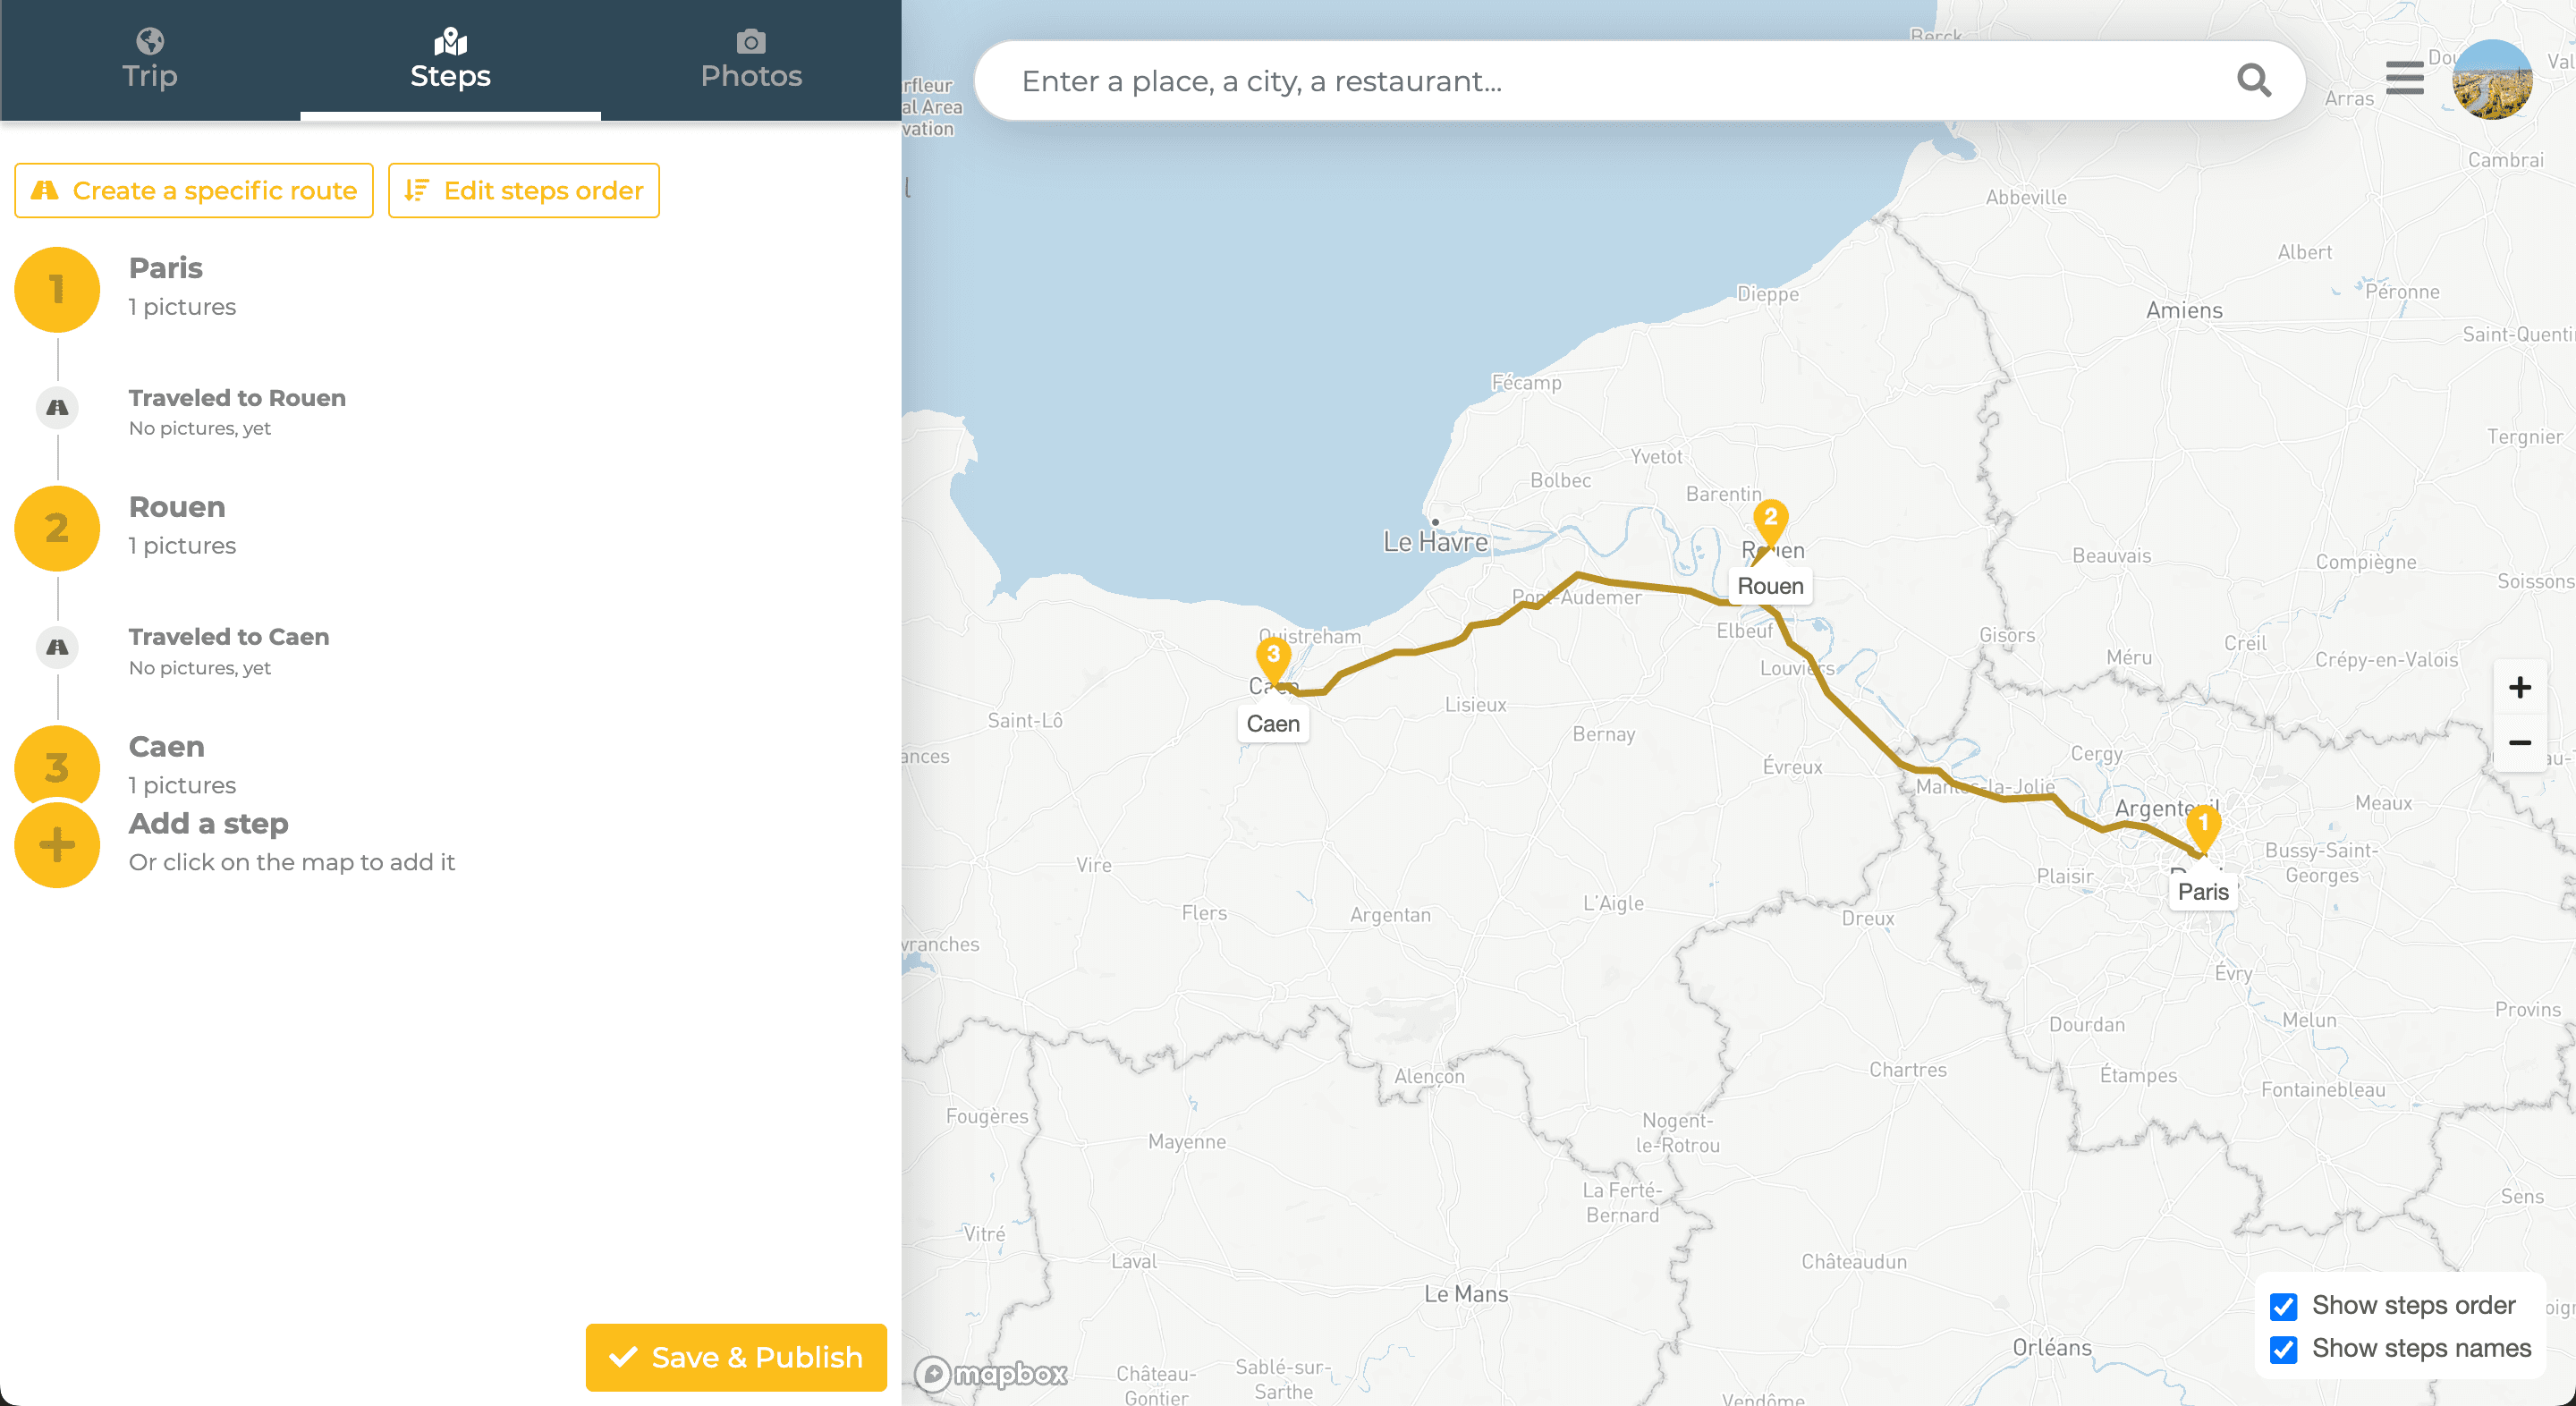
Add Trip Steps
Once the main location is chosen, you can add your trip steps by clicking on the “Steps” tab in the left panel.
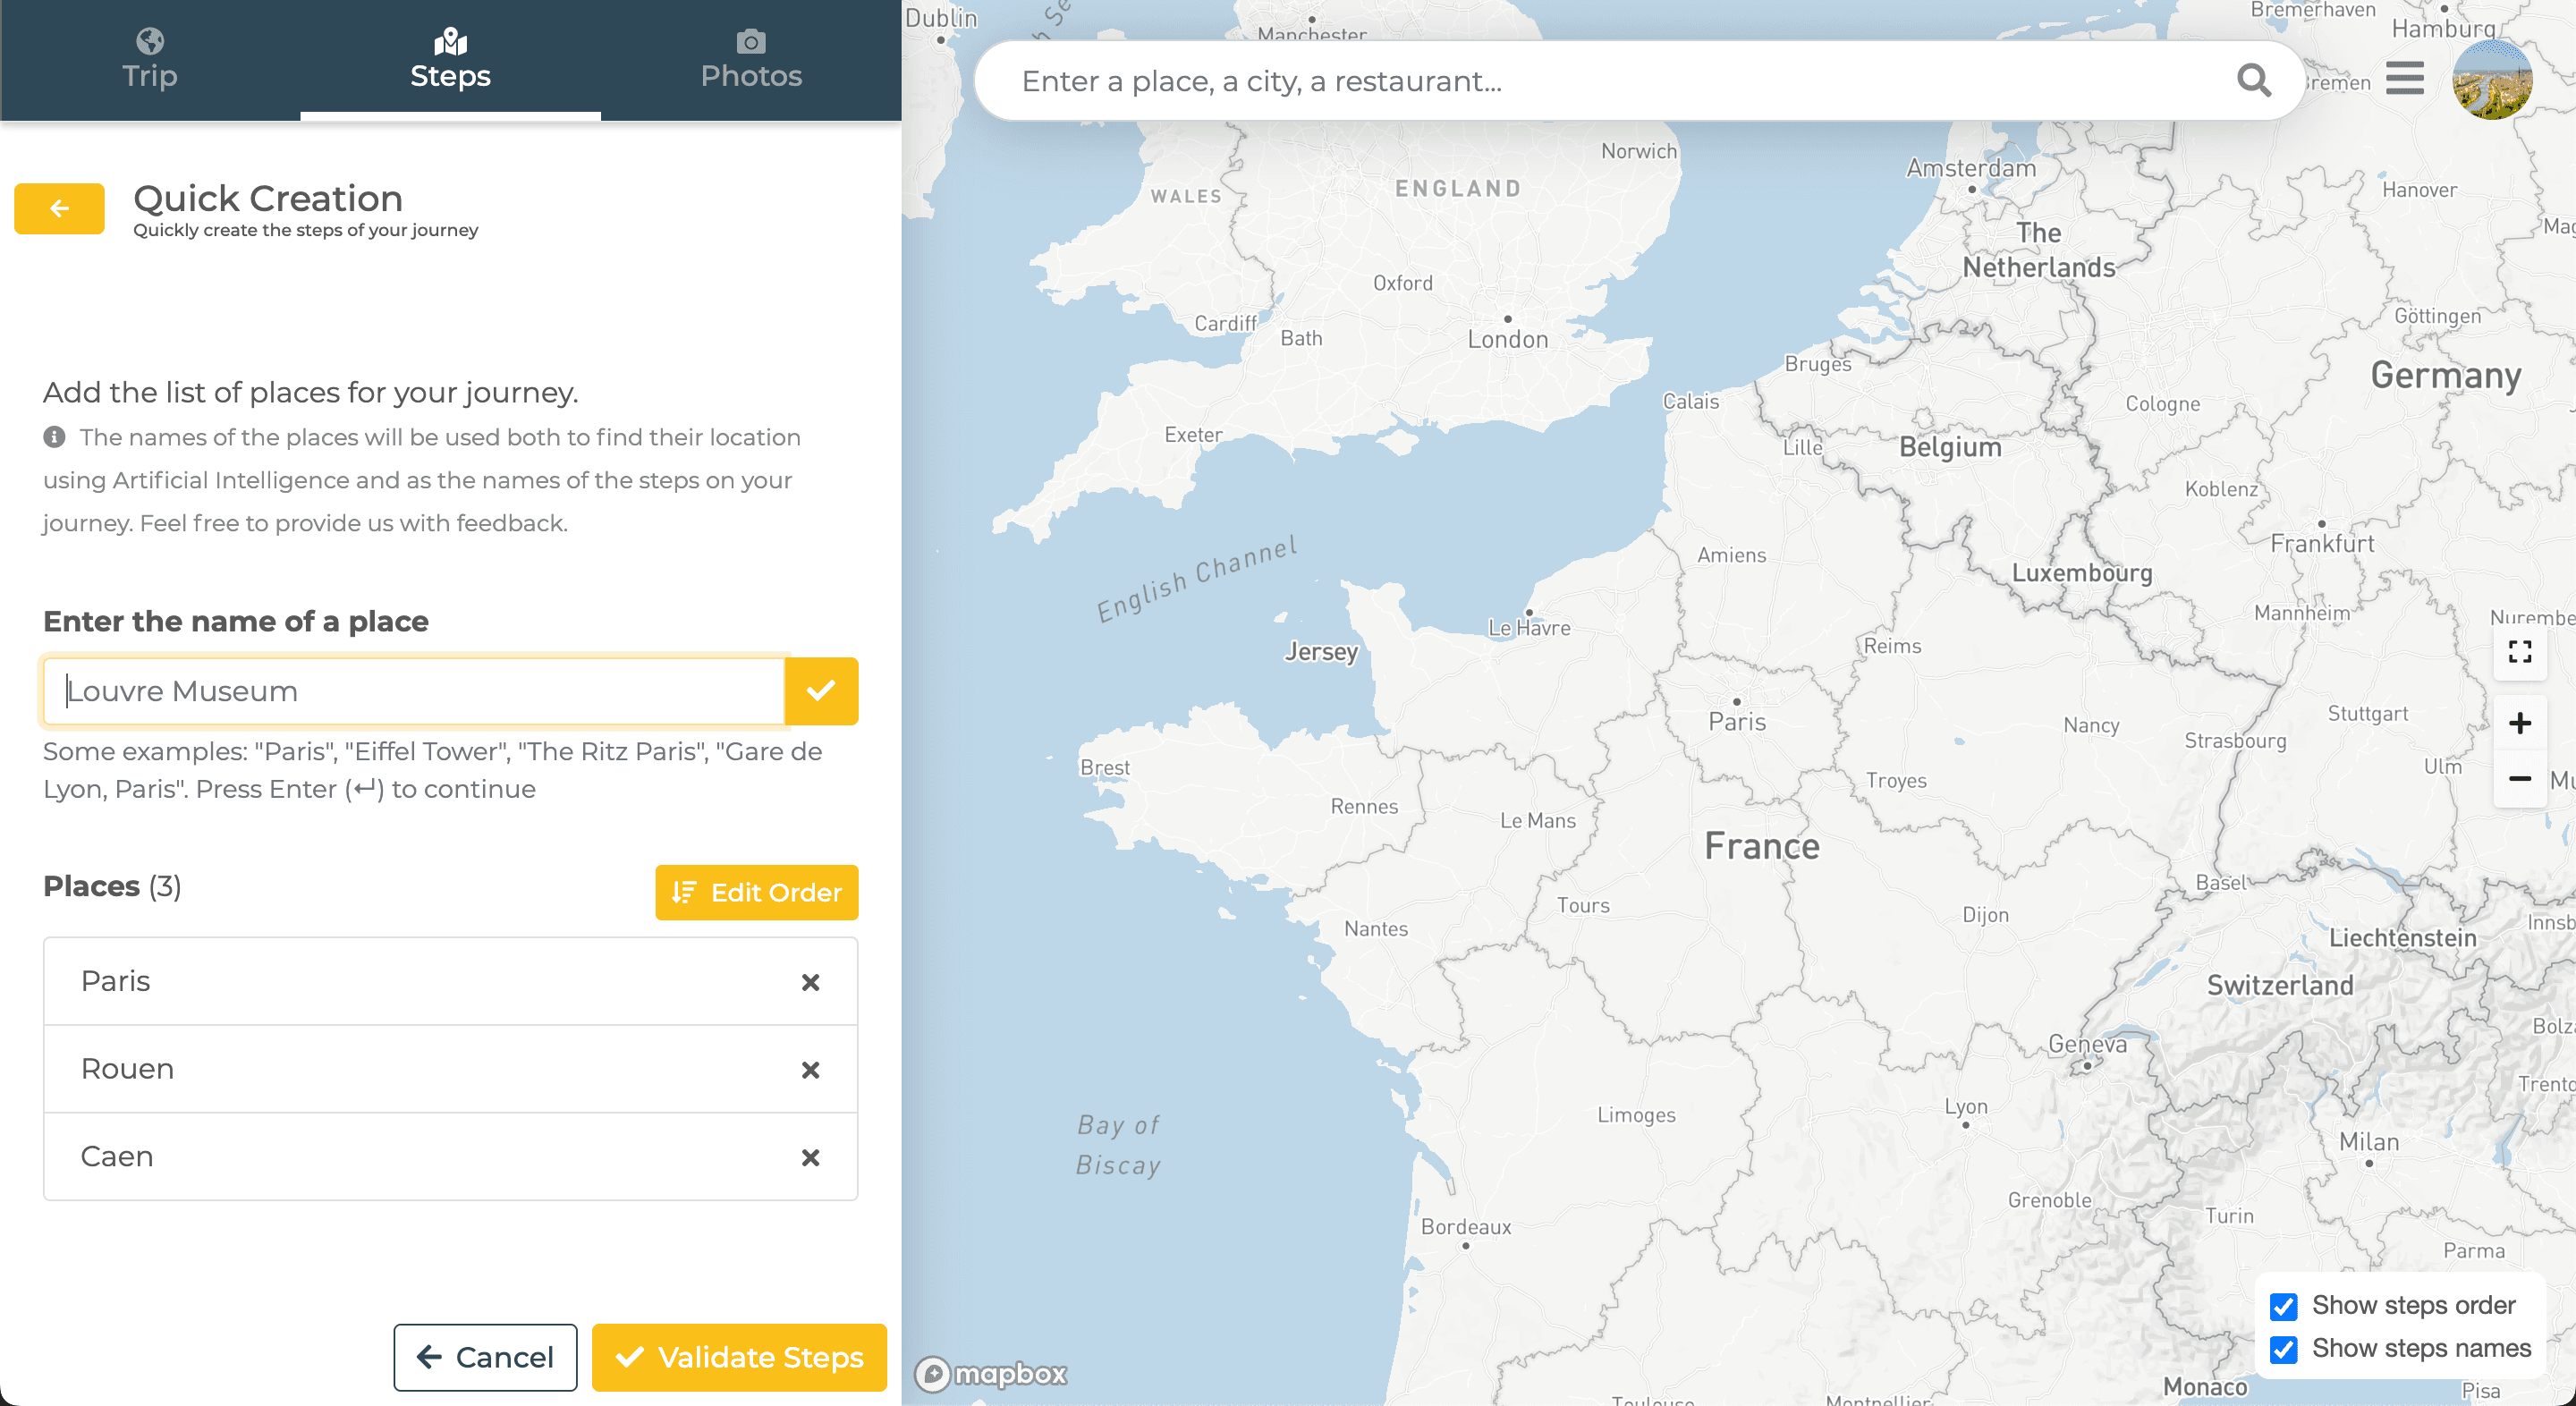
Using AI
To use AI for adding steps, click on "Add all steps", then type your text in the input field using city names or specific places like “Empire State Building”. Press Enter or click the icon to the right to confirm. Once all your steps are added, click "Validate steps" to save.
You can reorder steps using the "Edit order" button or remove a step by clicking the corresponding cross icon.
Manually
To add steps manually, click on "Add step-by-step". Then click on the map to place your step. Name your step in the field provided and add photos if you like by clicking "Add photos". Once all information is filled, validate. If needed, you can edit later.
To delete the current step, click "Delete this step".
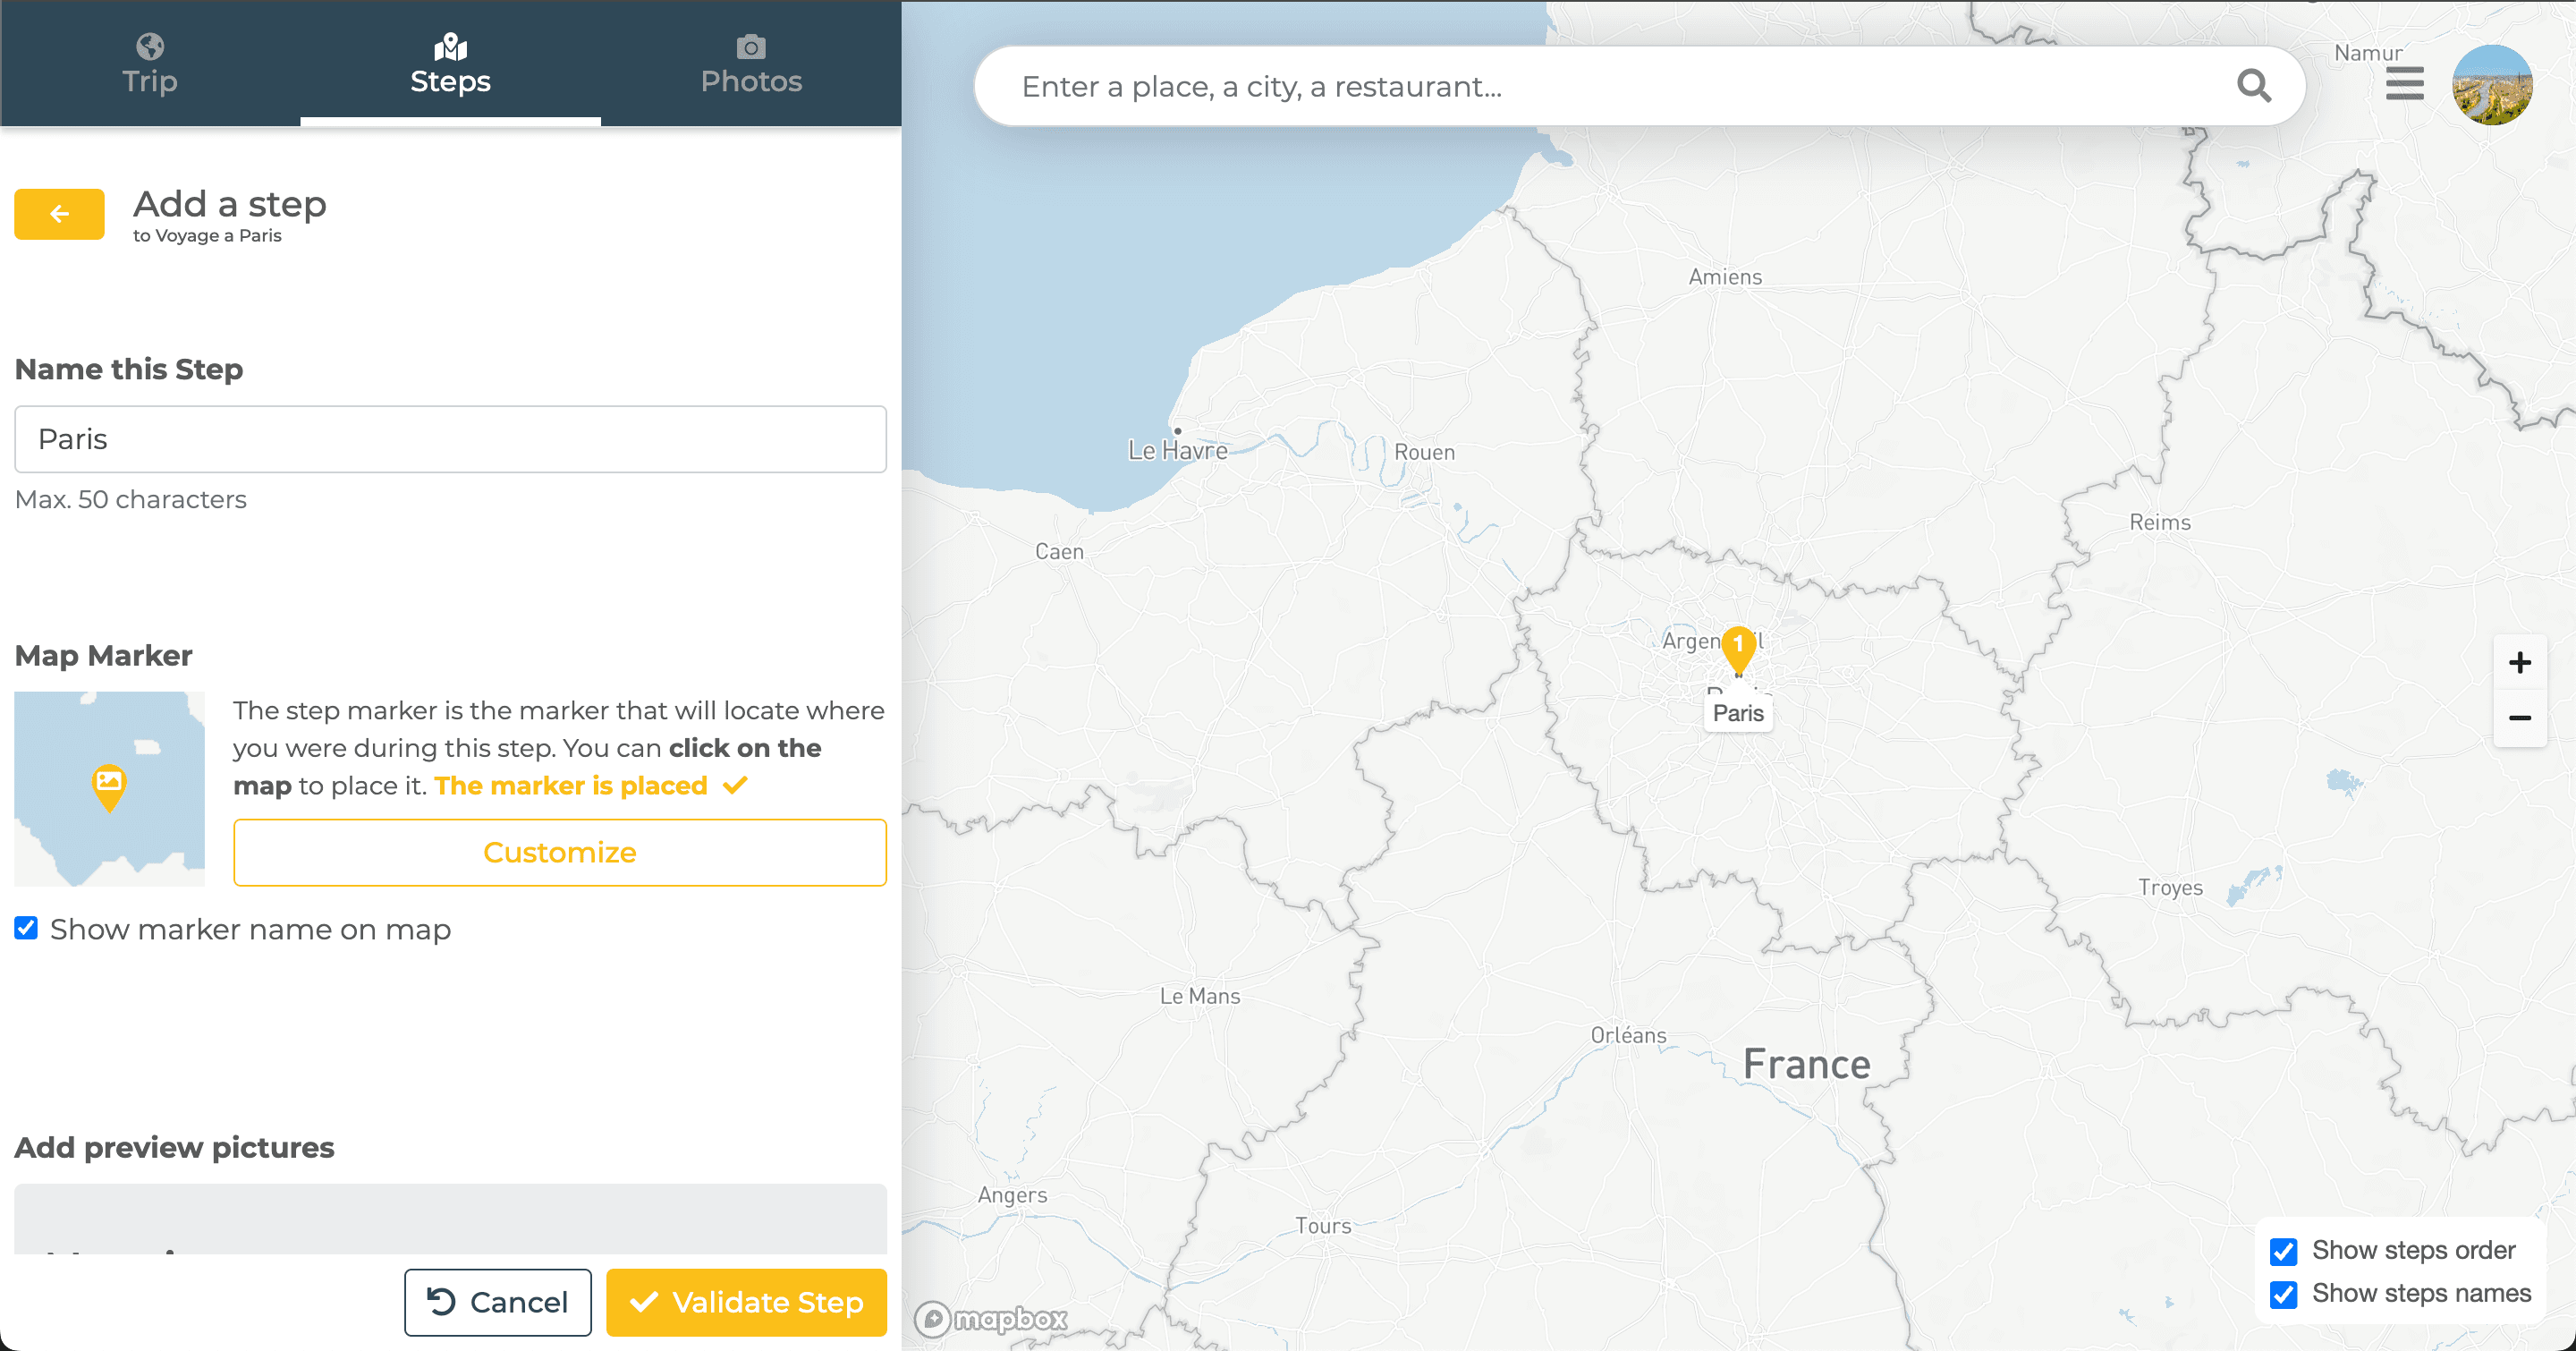
- You can change the marker style by clicking "Customize". More details on this page: https://www.traveledmap.com/help/customize
- You can choose whether the marker name is shown on the map by checking or unchecking the box.
Add Photos
To add photos, go to the "Photos" tab in the left panel. Upload your images by clicking "Upload photos" or add external links by clicking "Enter external URLs". You can assign photos to your main marker, steps, or routes.
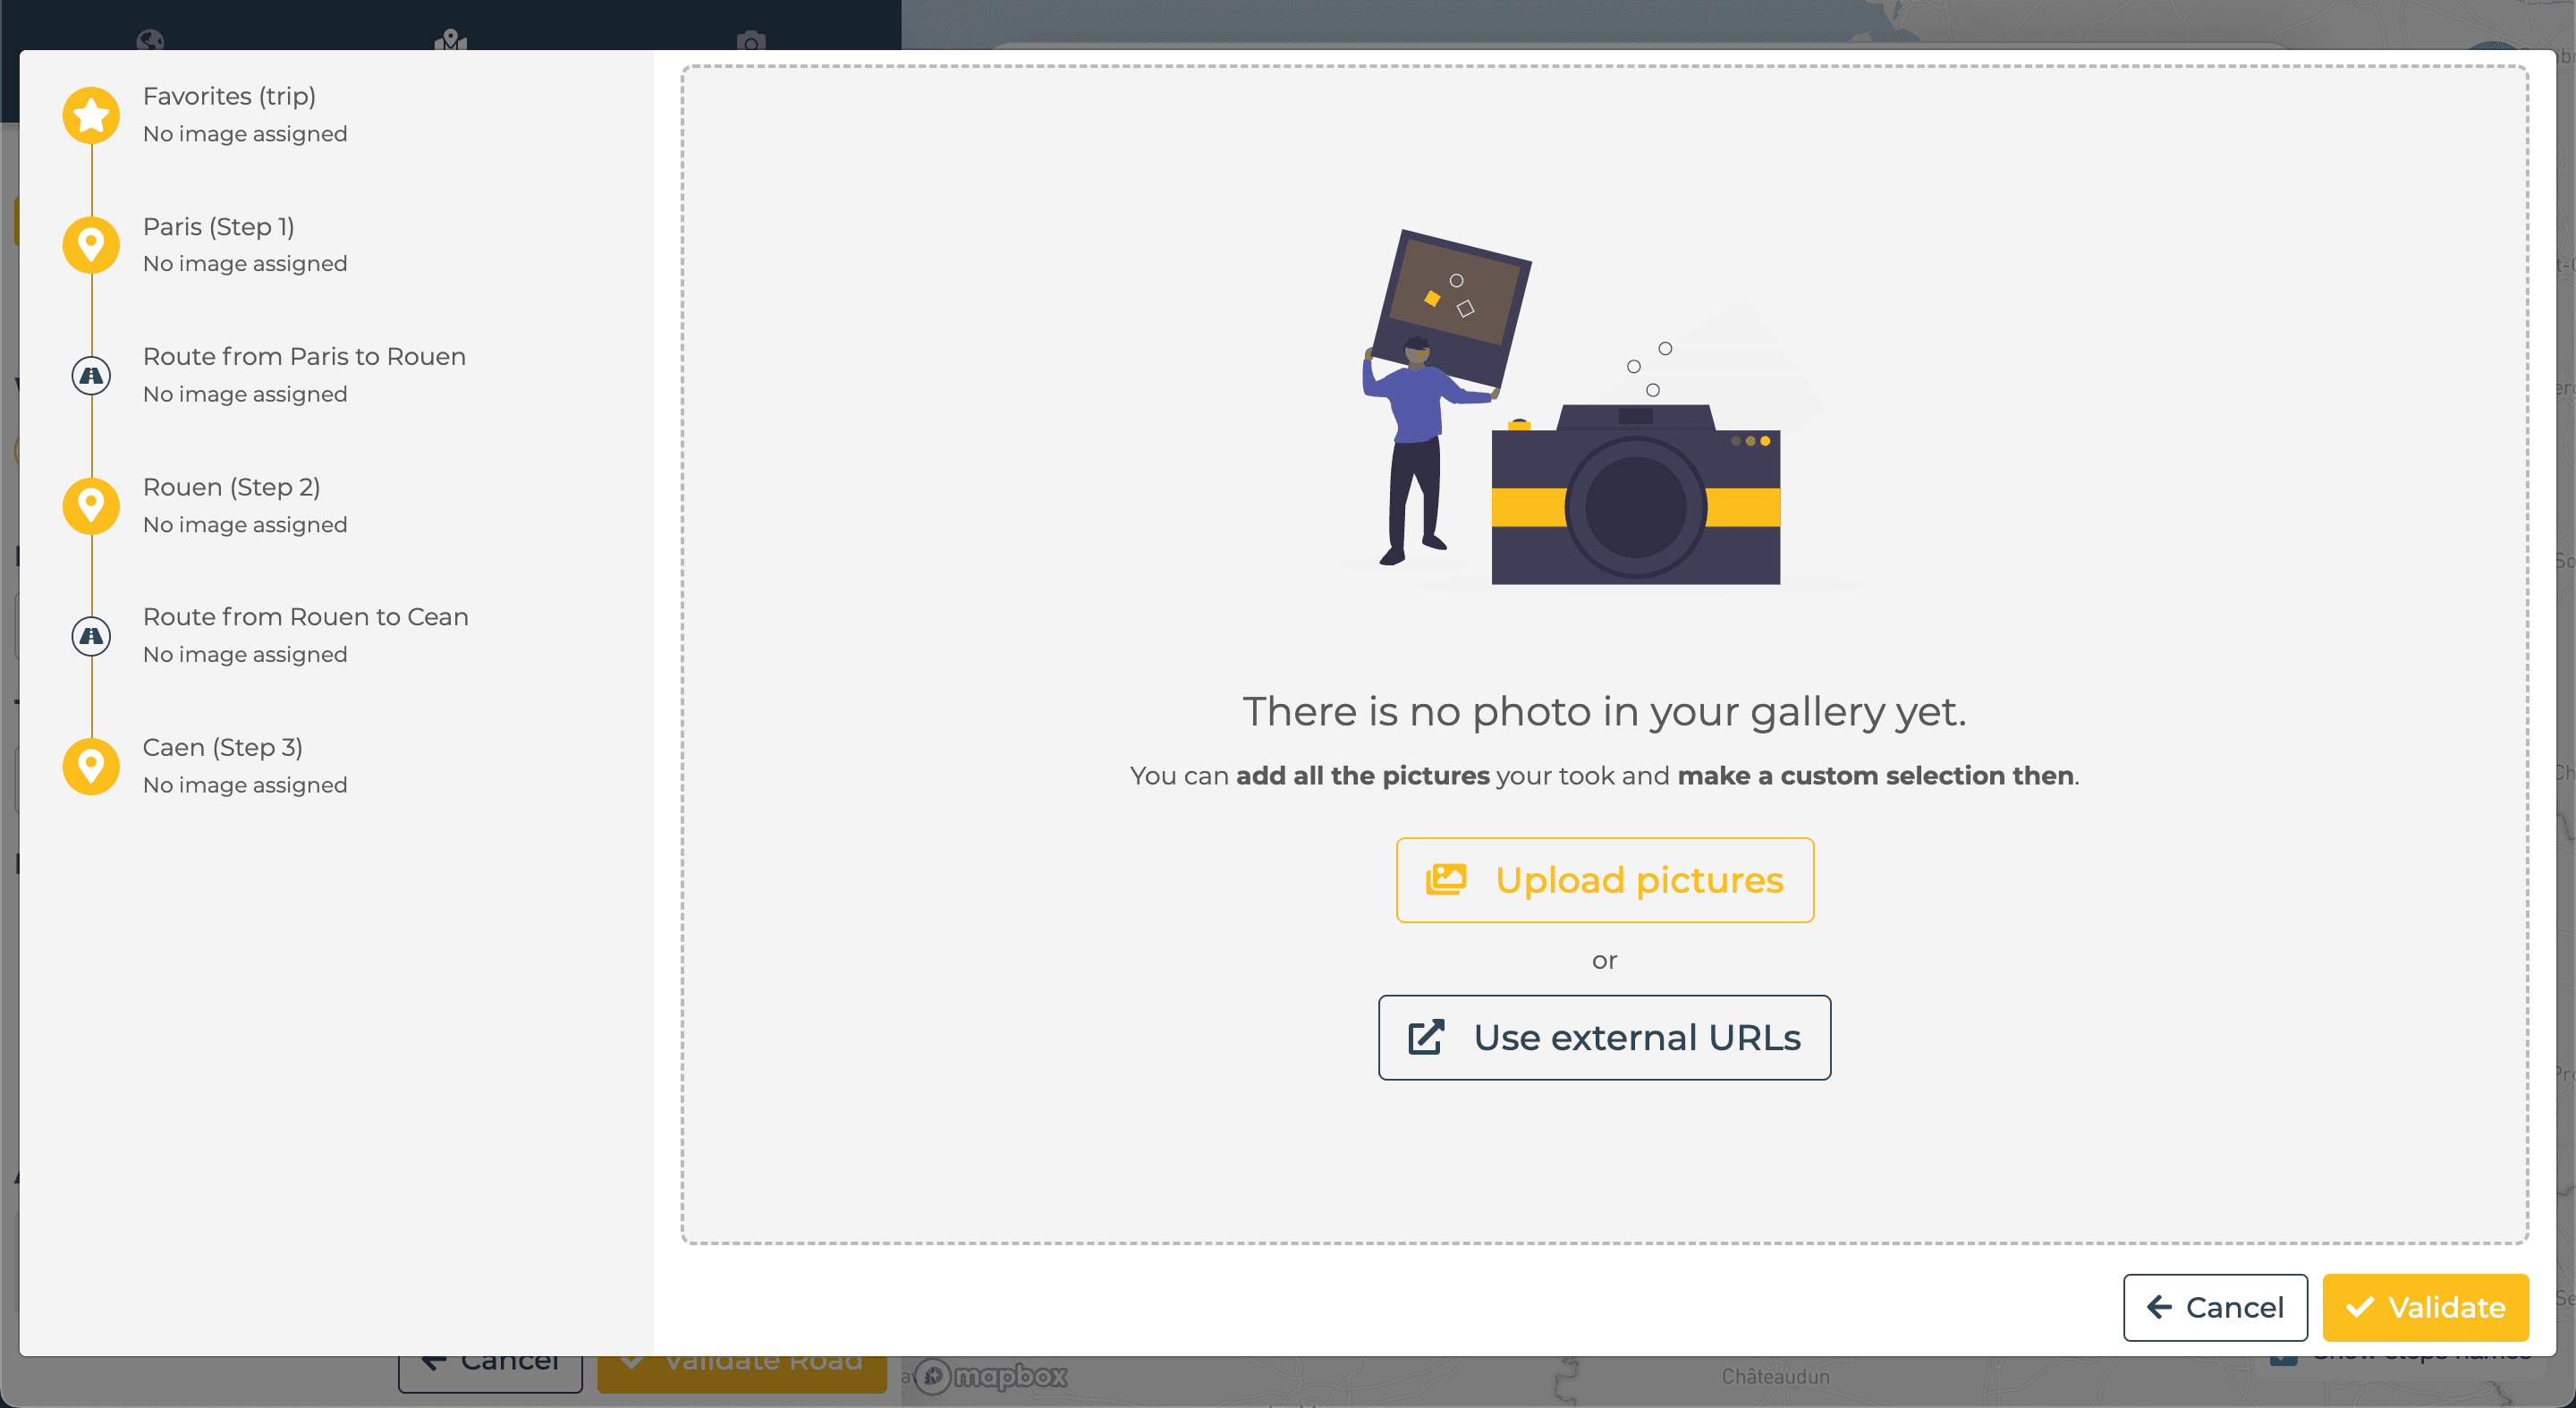
Assign by Location
To assign photos to steps based on location, ensure they were taken with GPS enabled and airplane mode off. GPS data embedded in the photos will link them automatically to steps. Then click "Assign by location" and "Validate" in the bottom right to save.
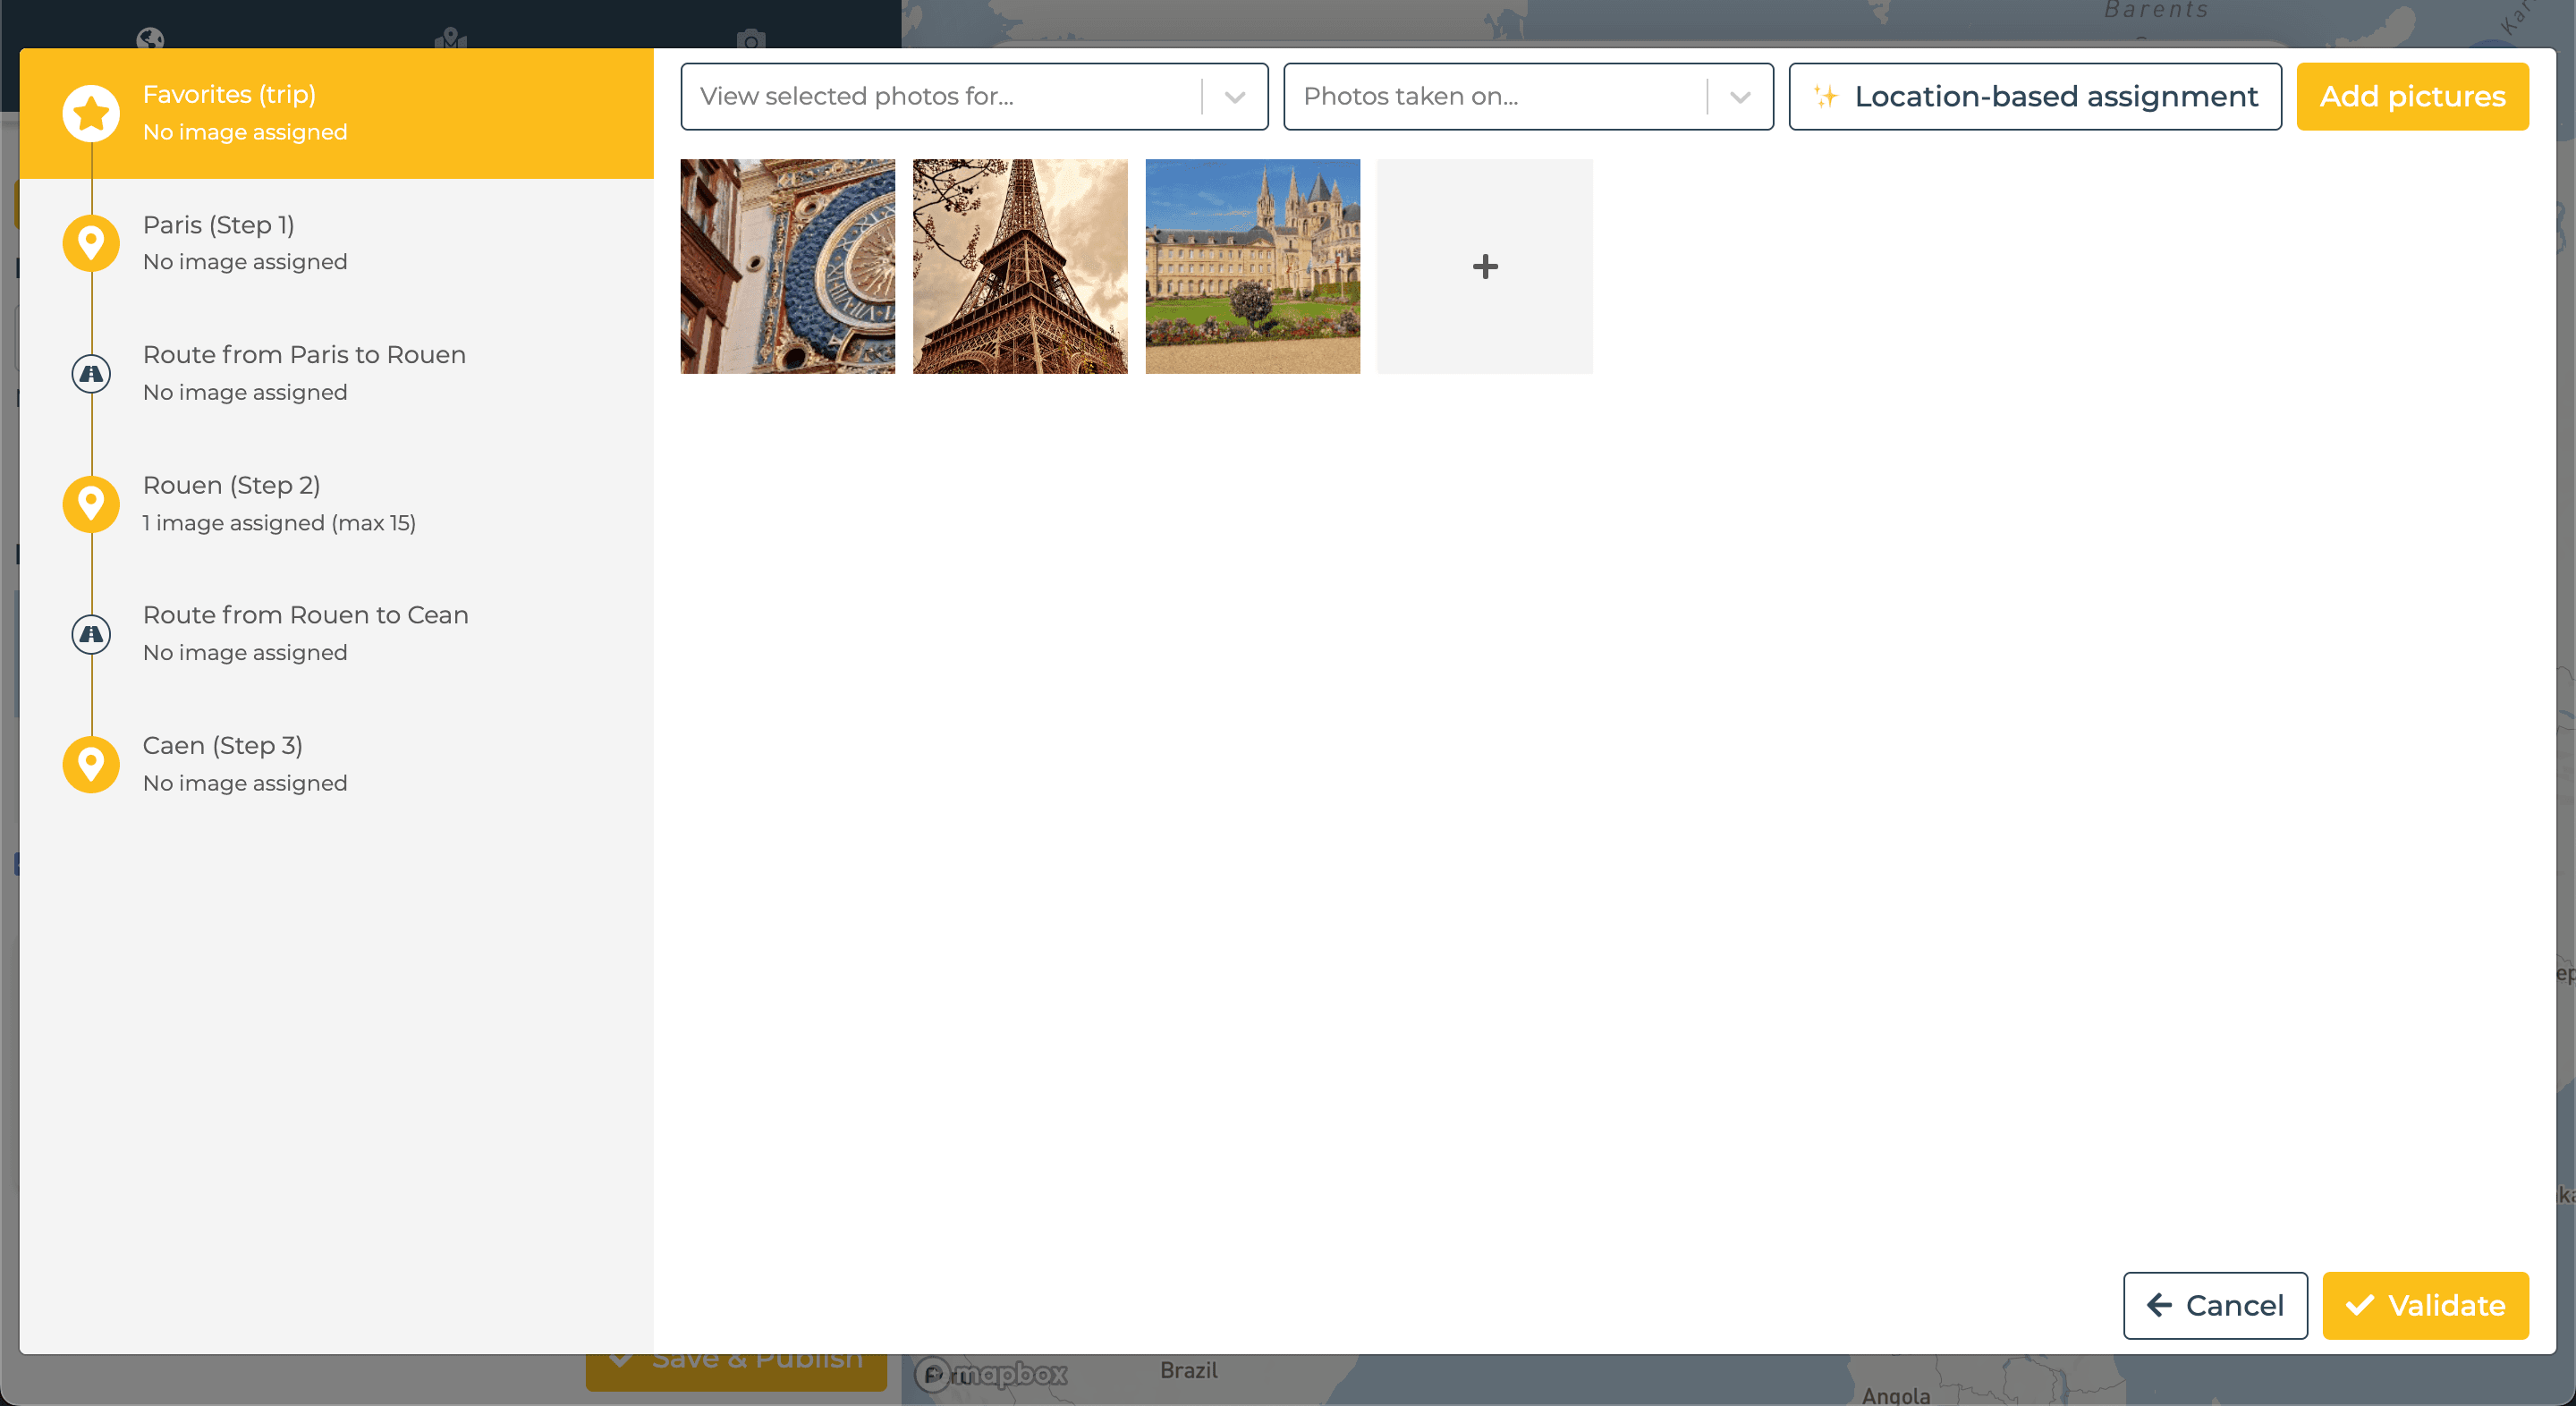
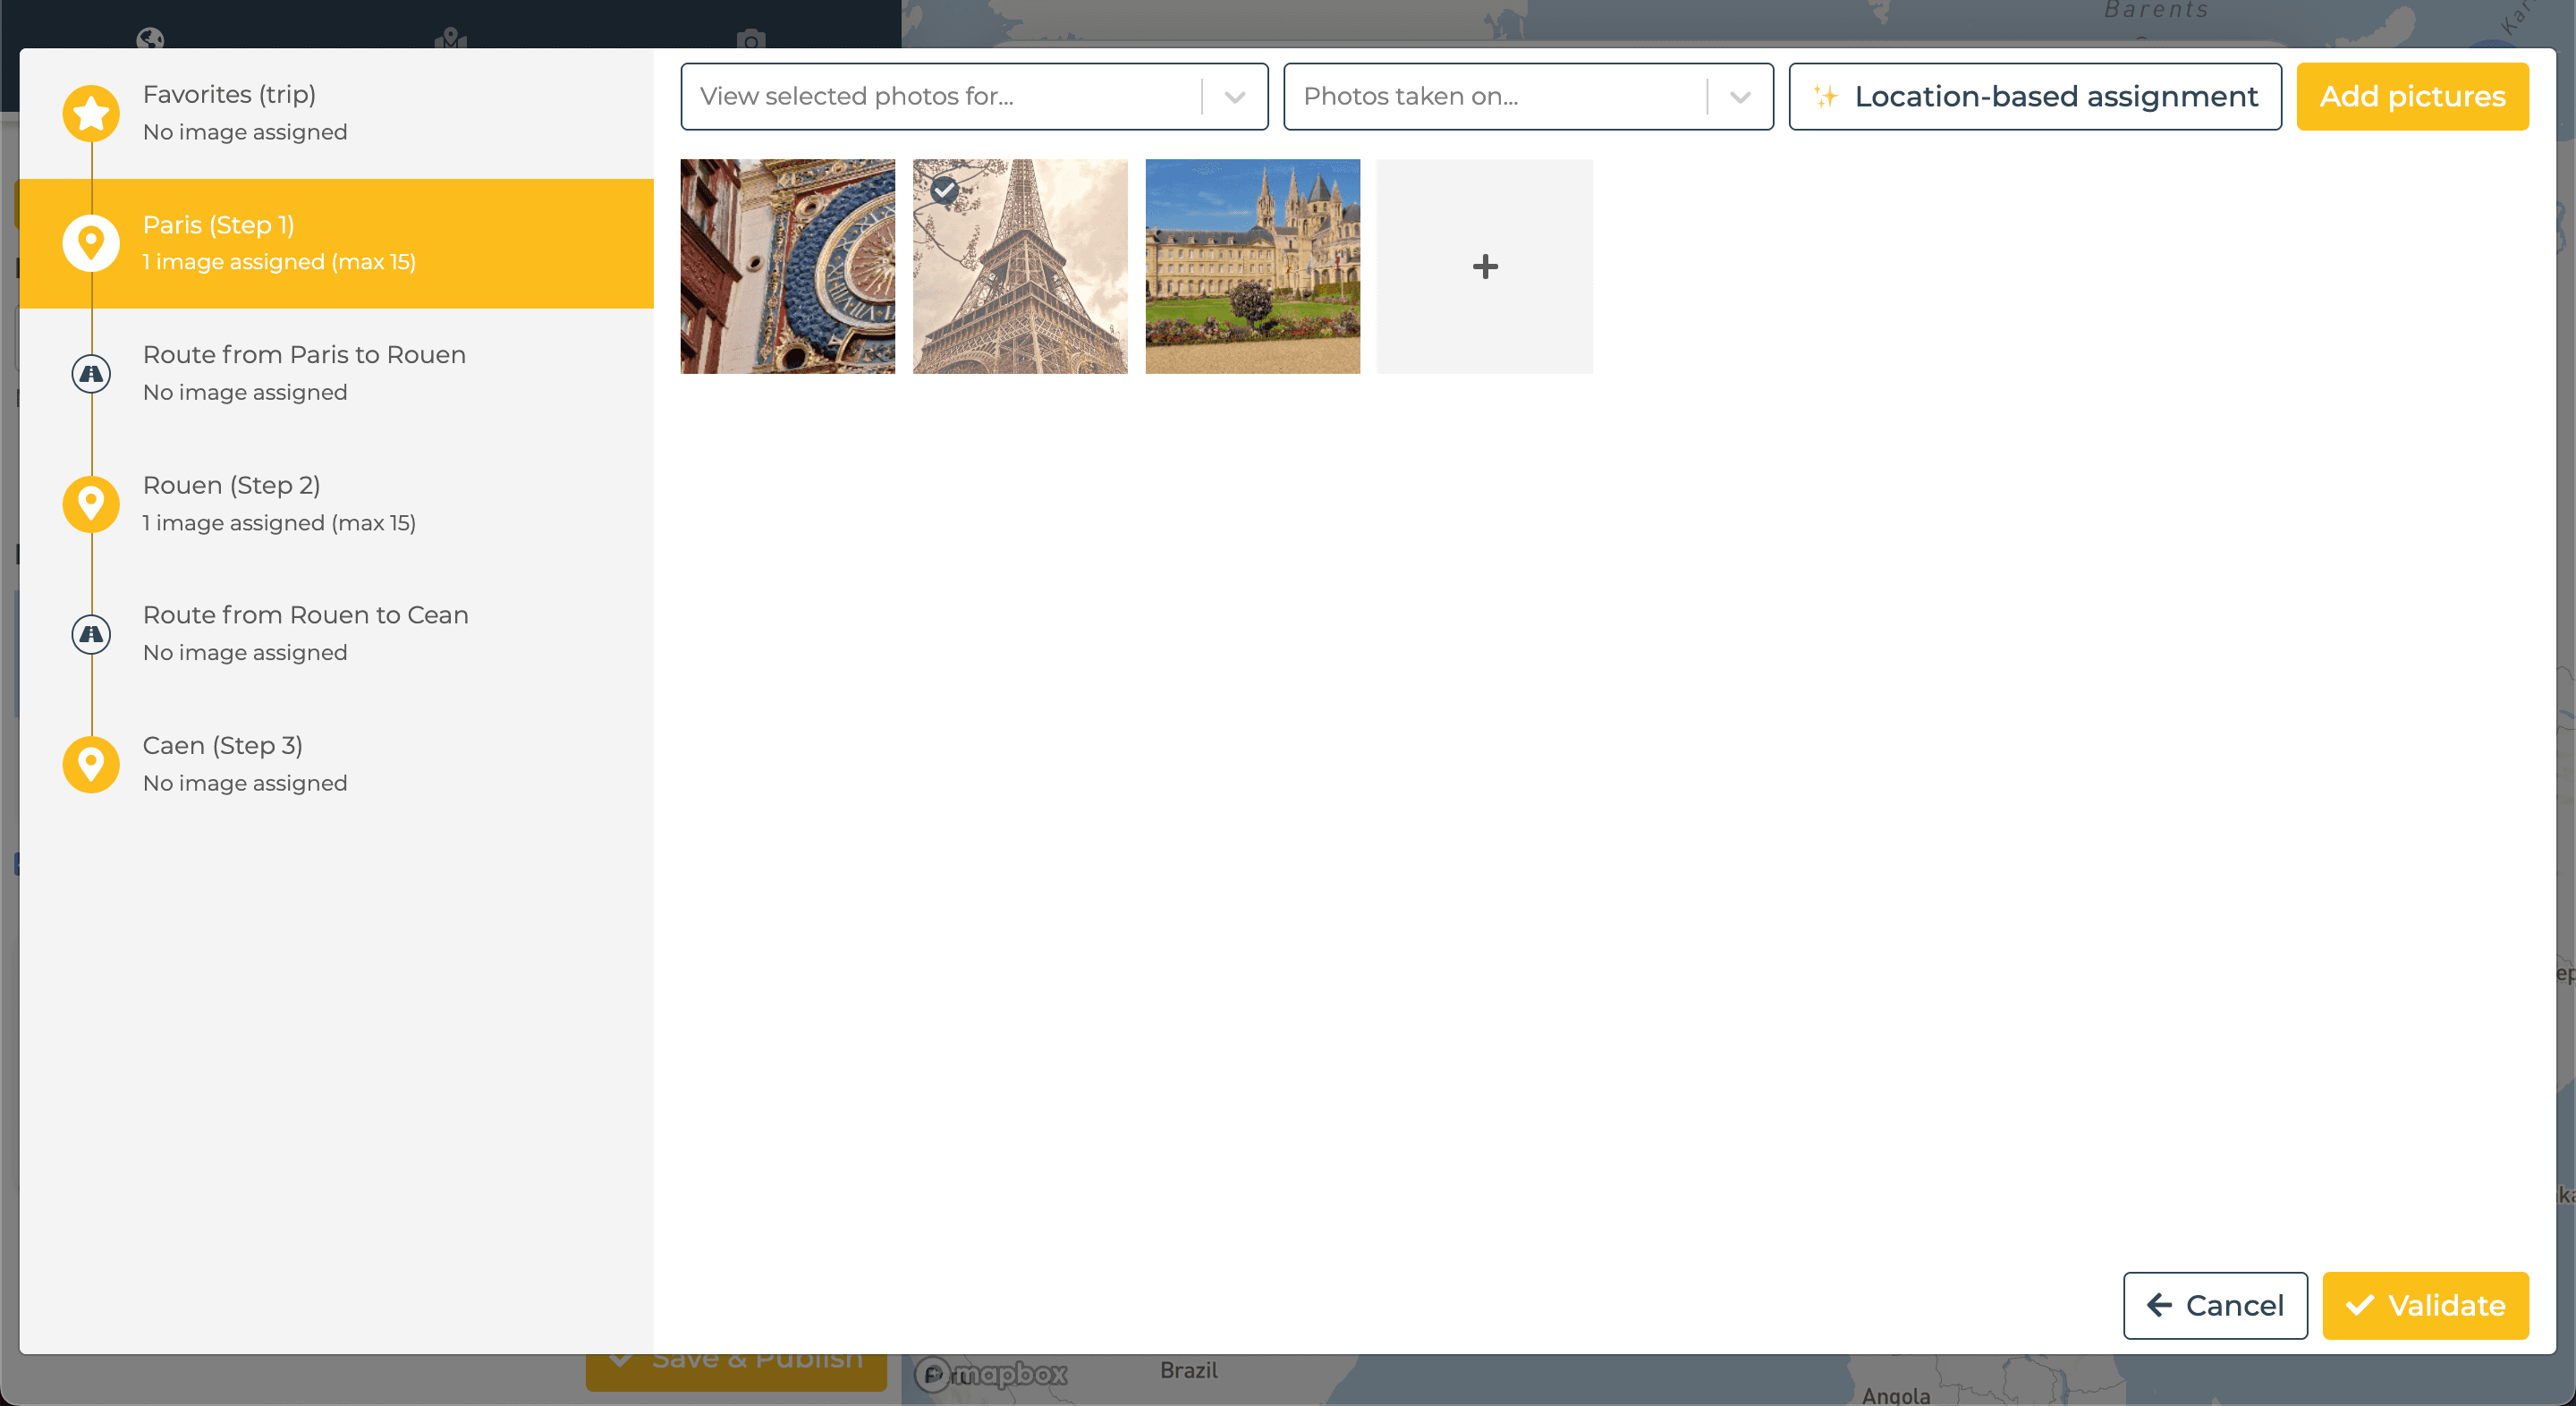
Assign Manually
To manually assign photos, select the step or route, check the photos to attach, and click "Validate" in the bottom right to save.
Saving
Once your trip is complete, go through the "Trip", "Steps", and "Photos" tabs to make sure everything is correct. If all looks good, you have two options:
- Click "Save as draft" to keep the trip private. Only you will see it on your map.
- Click "Save & Publish" to make it public. Anyone with access to your map will see it.
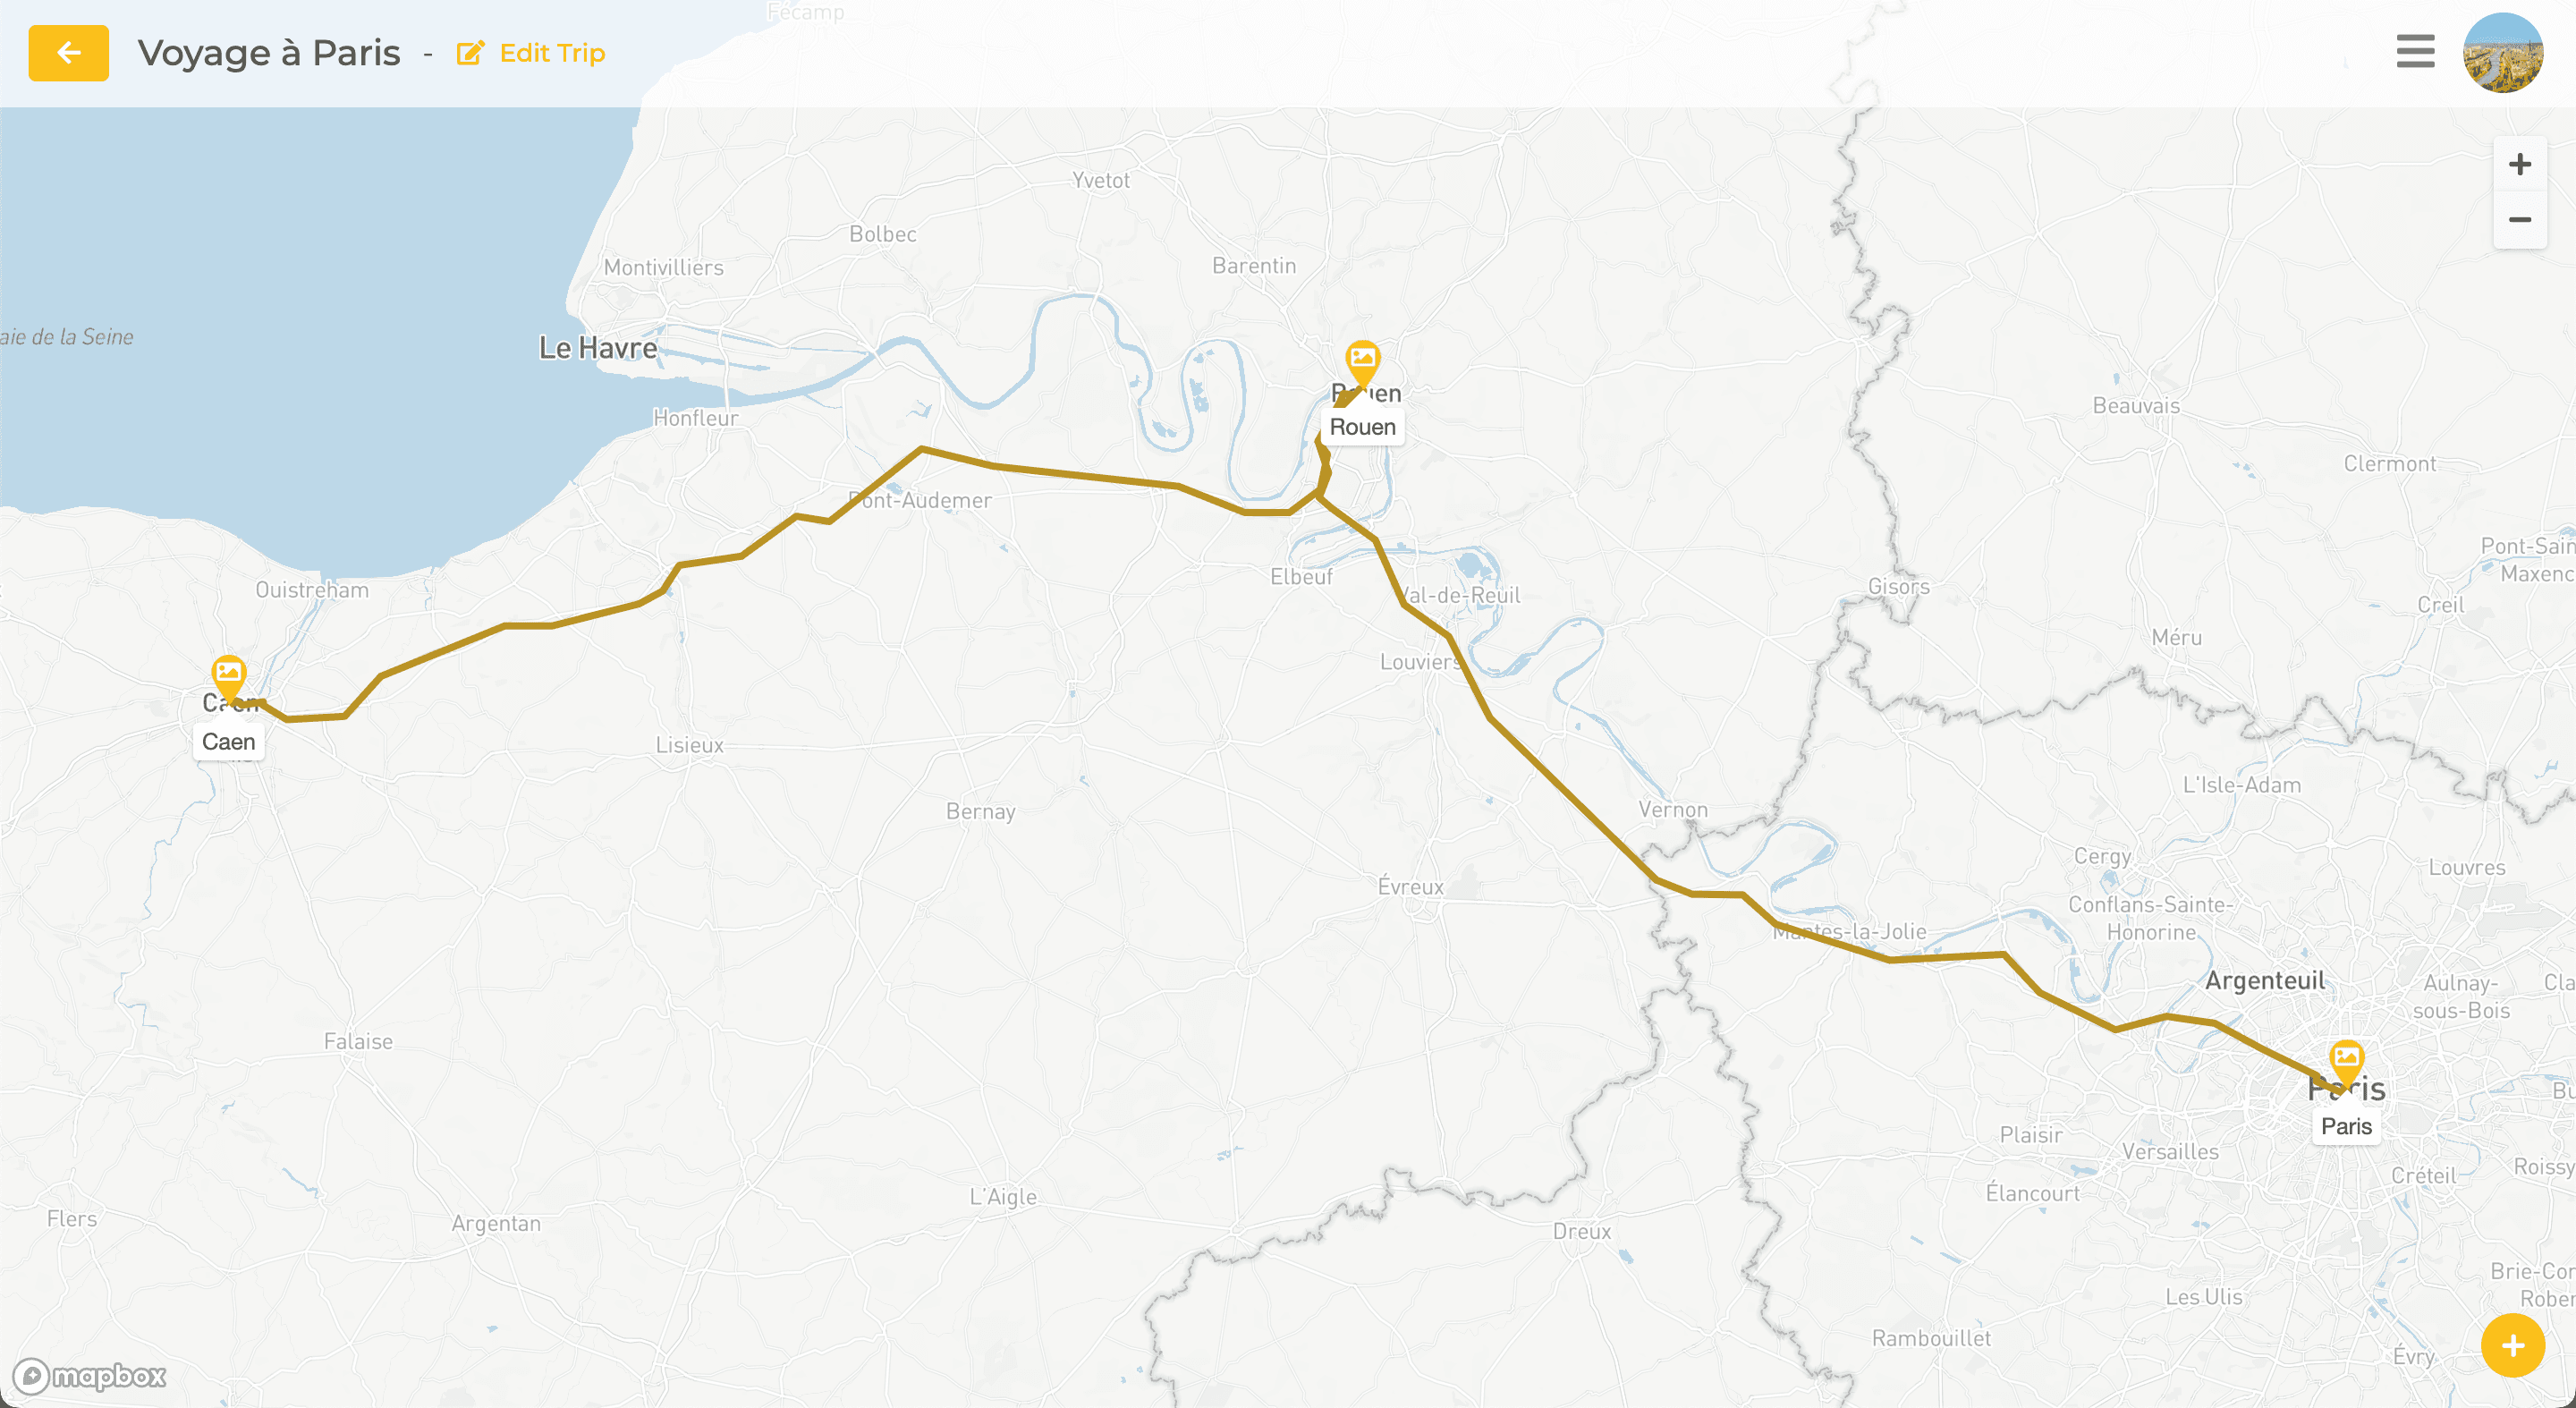
After saving, your trip will appear on the map. To view the steps, click on the main location, then view photos by clicking on each step.
Editing
Forgot something or made a mistake? Don’t worry! You can edit your trip anytime by clicking "Edit trip", then adjusting the desired elements. Once done, click "Save & Publish" again.
If you encounter any issues, feel free to contact our team by email at contact@traveledmap.com